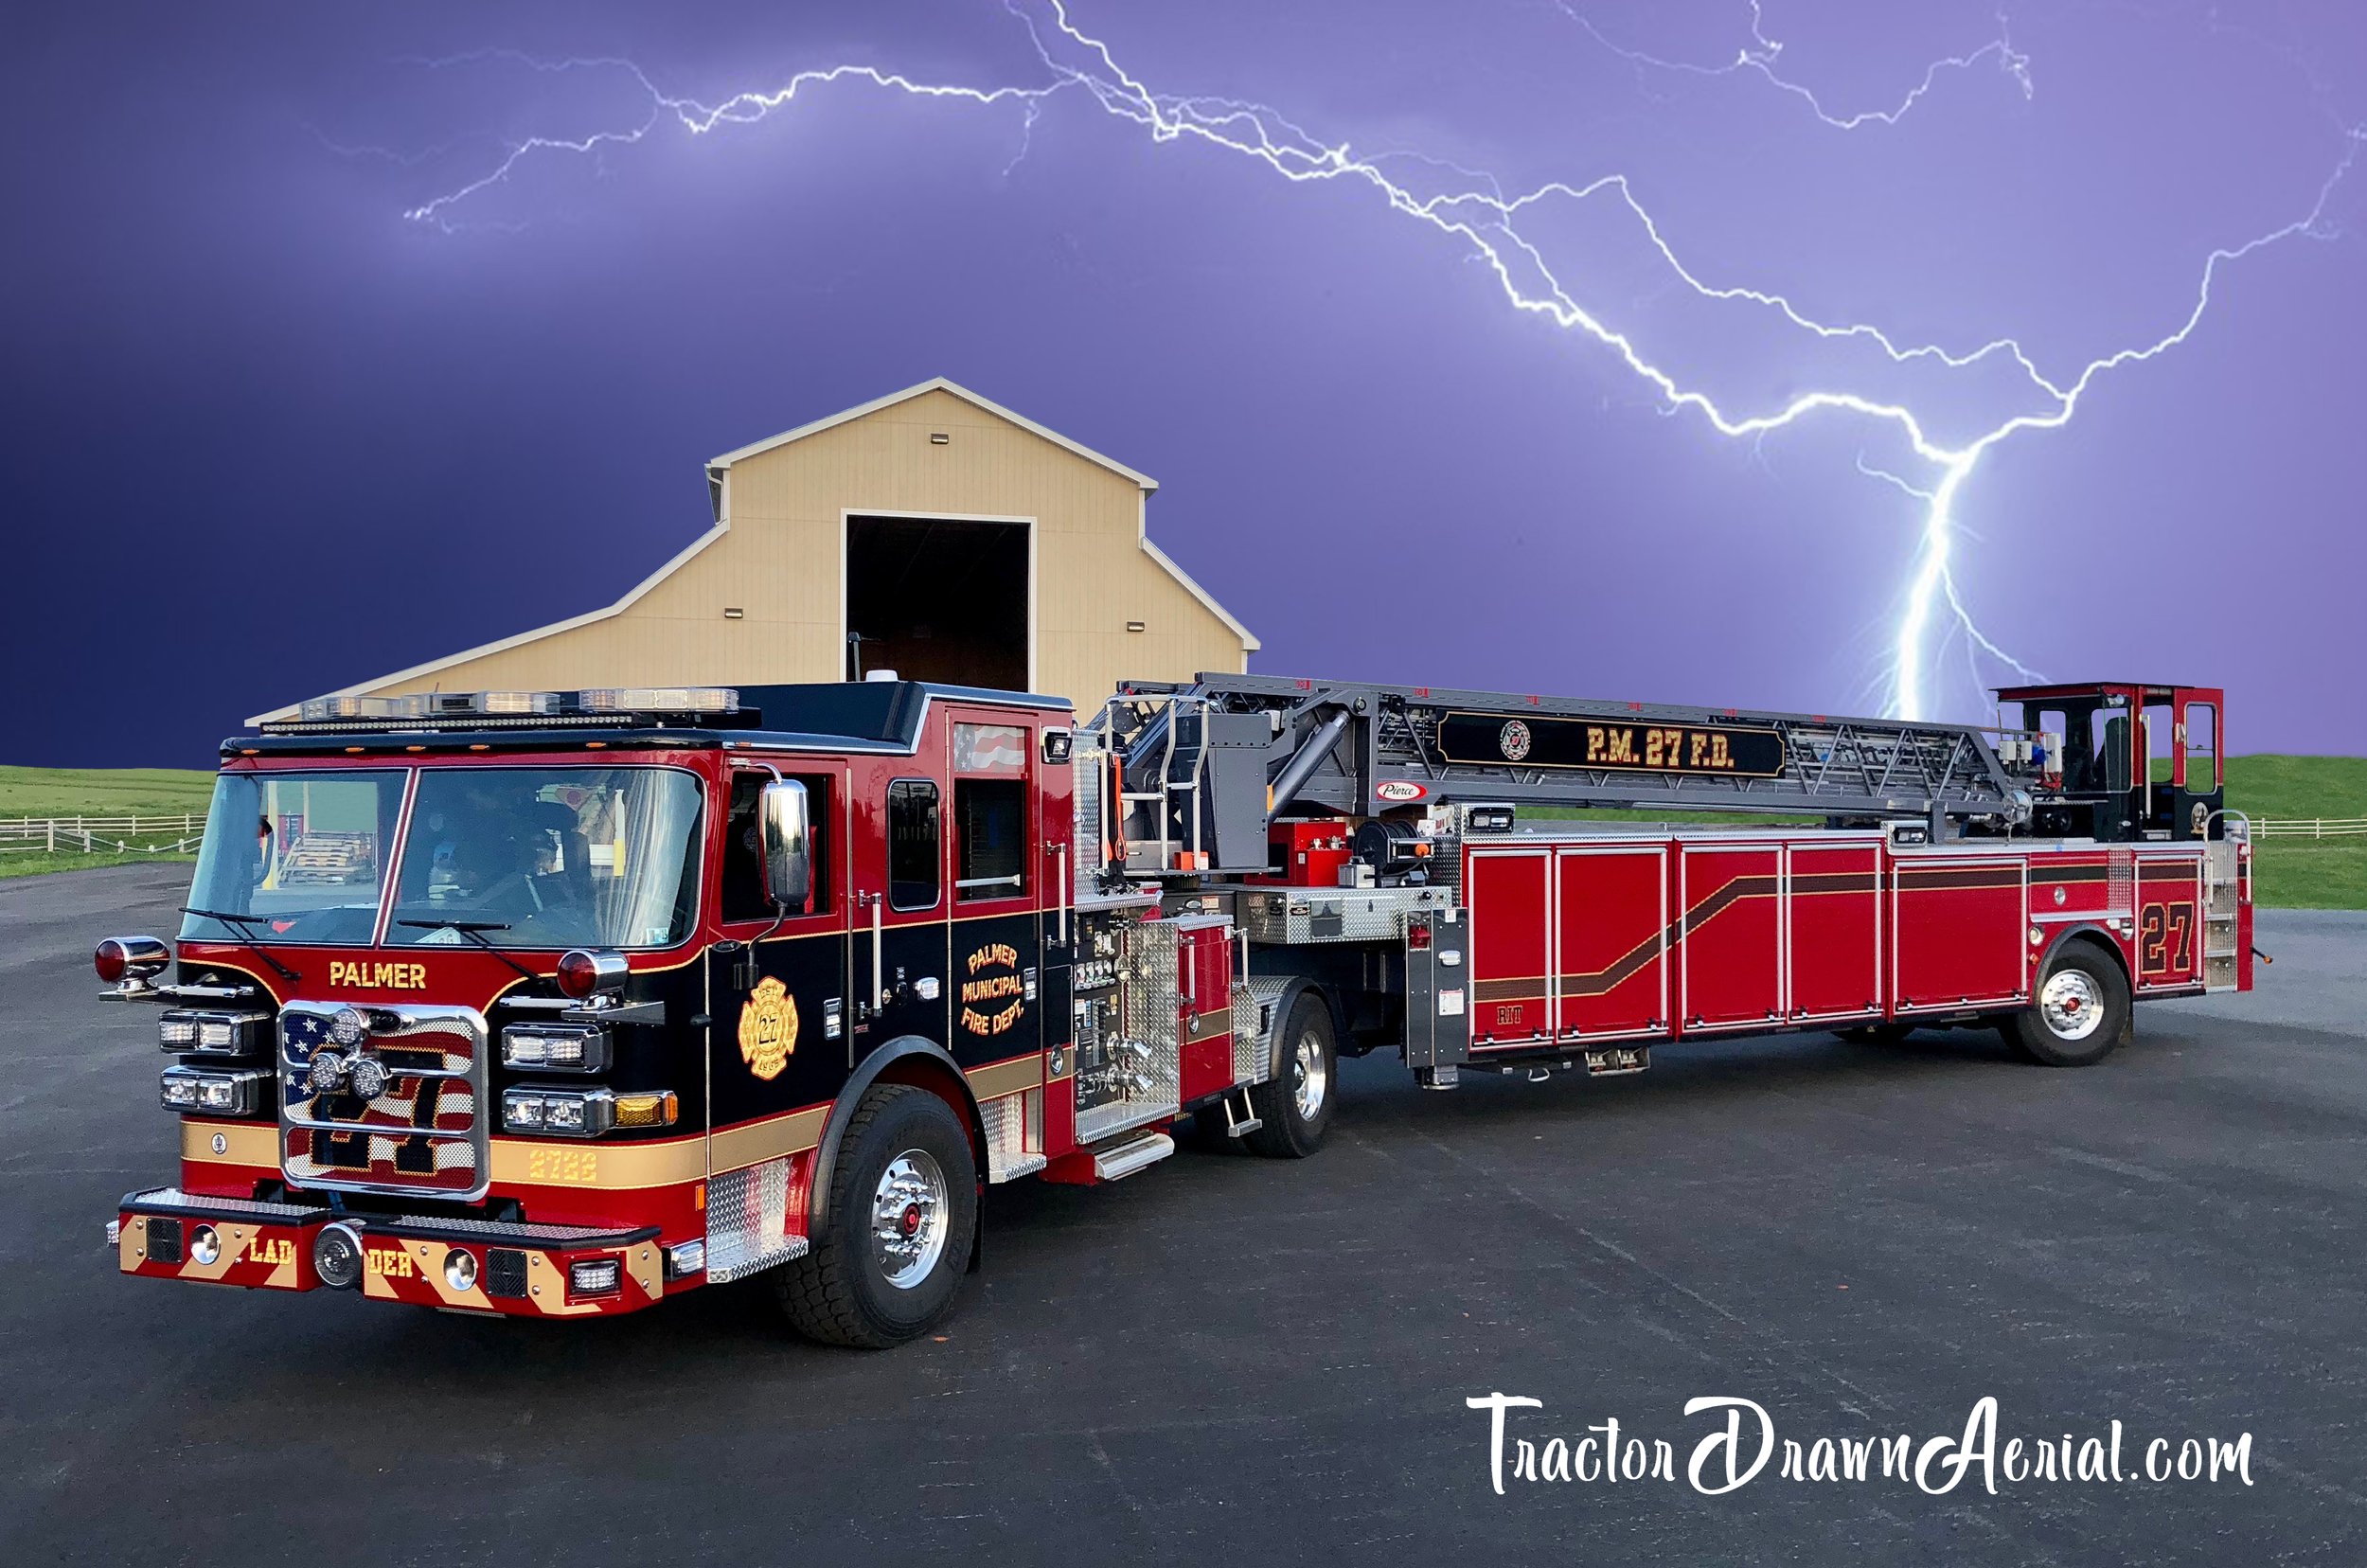
center marker
Because the tiller operator is able to steer the back end of the trailer independently of the tractor, it’s important that the trailer tracks behind the tractor when driving down the road. The tiller operator will need to bring the trailer back to the in-line position with the tractor after steering out of a corner.
The center marker is a tool that helps the tiller operator verify that the trailer is in the in-line position with the tractor when the tractor is driving in a straight line. The tiller operator looks down the aerial towards the cab of the tractor and when they see that the center marker is centered in between the bed of the aerial they know that the trailer is tracking straight with the tractor. (Click to enlarge)


This tool is used when the tiller operator is trying to line the trailer up with the tractor. This can only happen if the tractor is driving in a straight line. It’s common to see new tiller operators try to use the center marker to line up the trailer with the tractor while at the same time not recognizing that the tractor is actually turning.
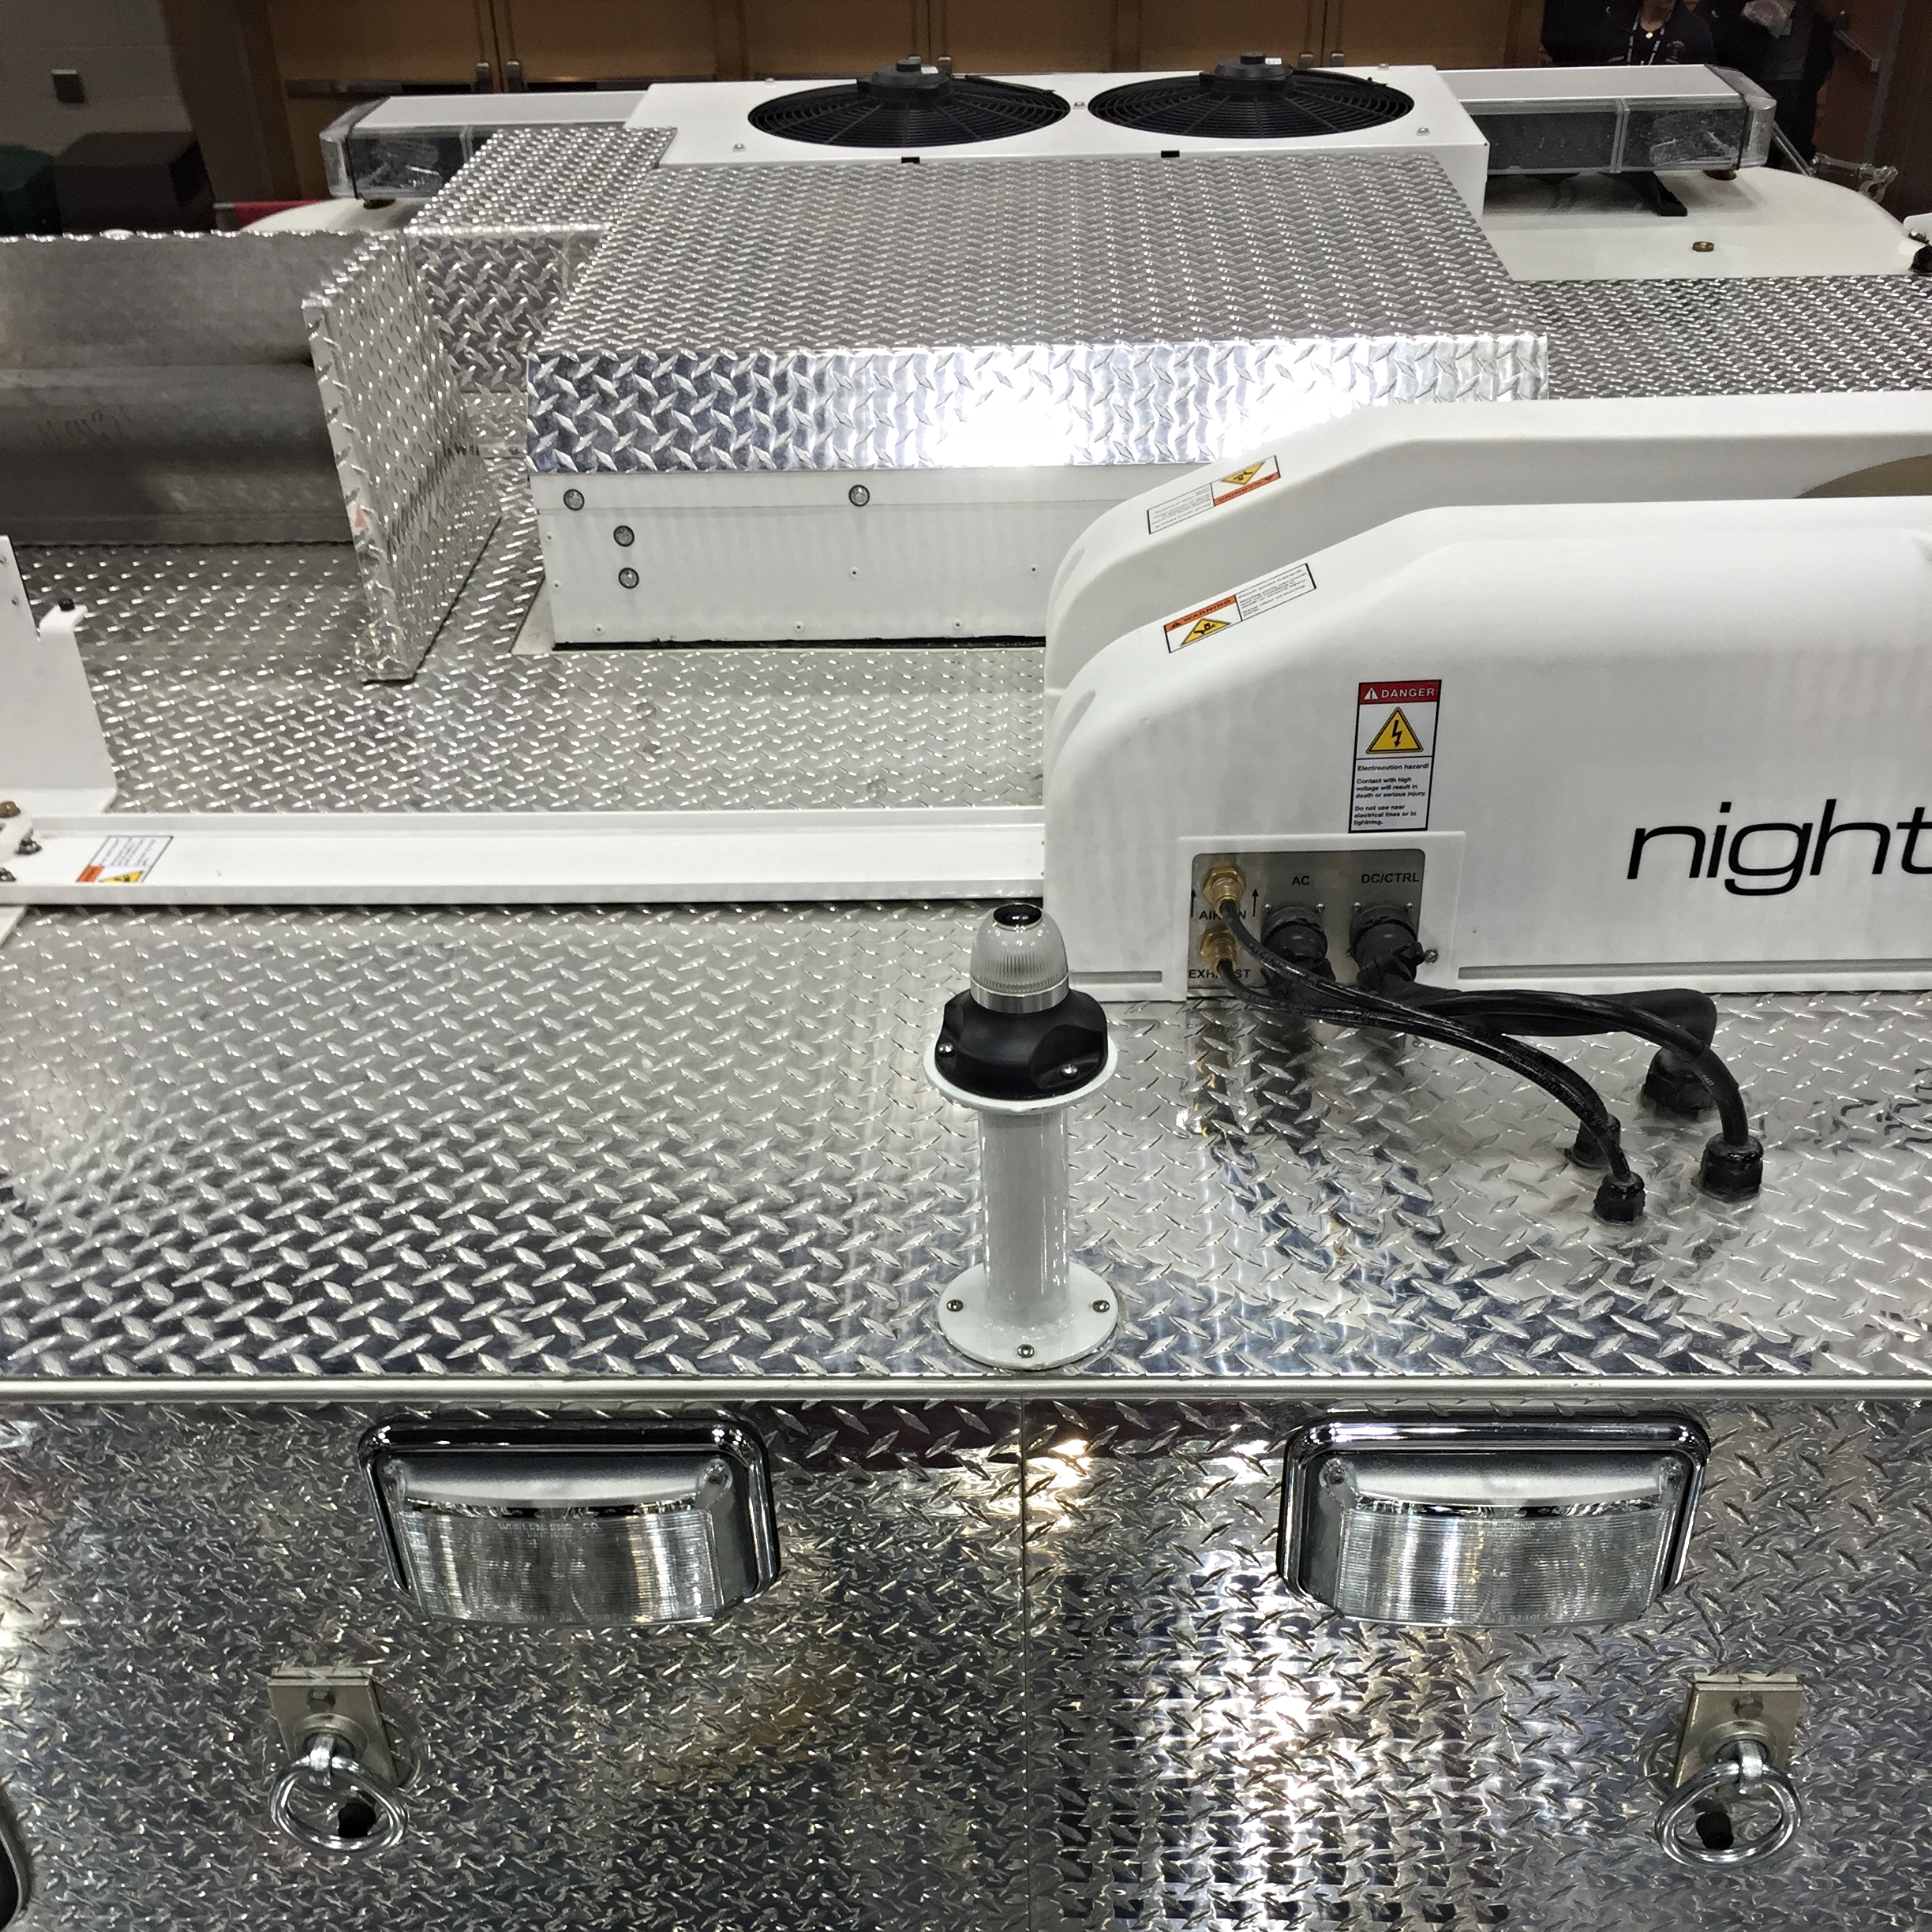
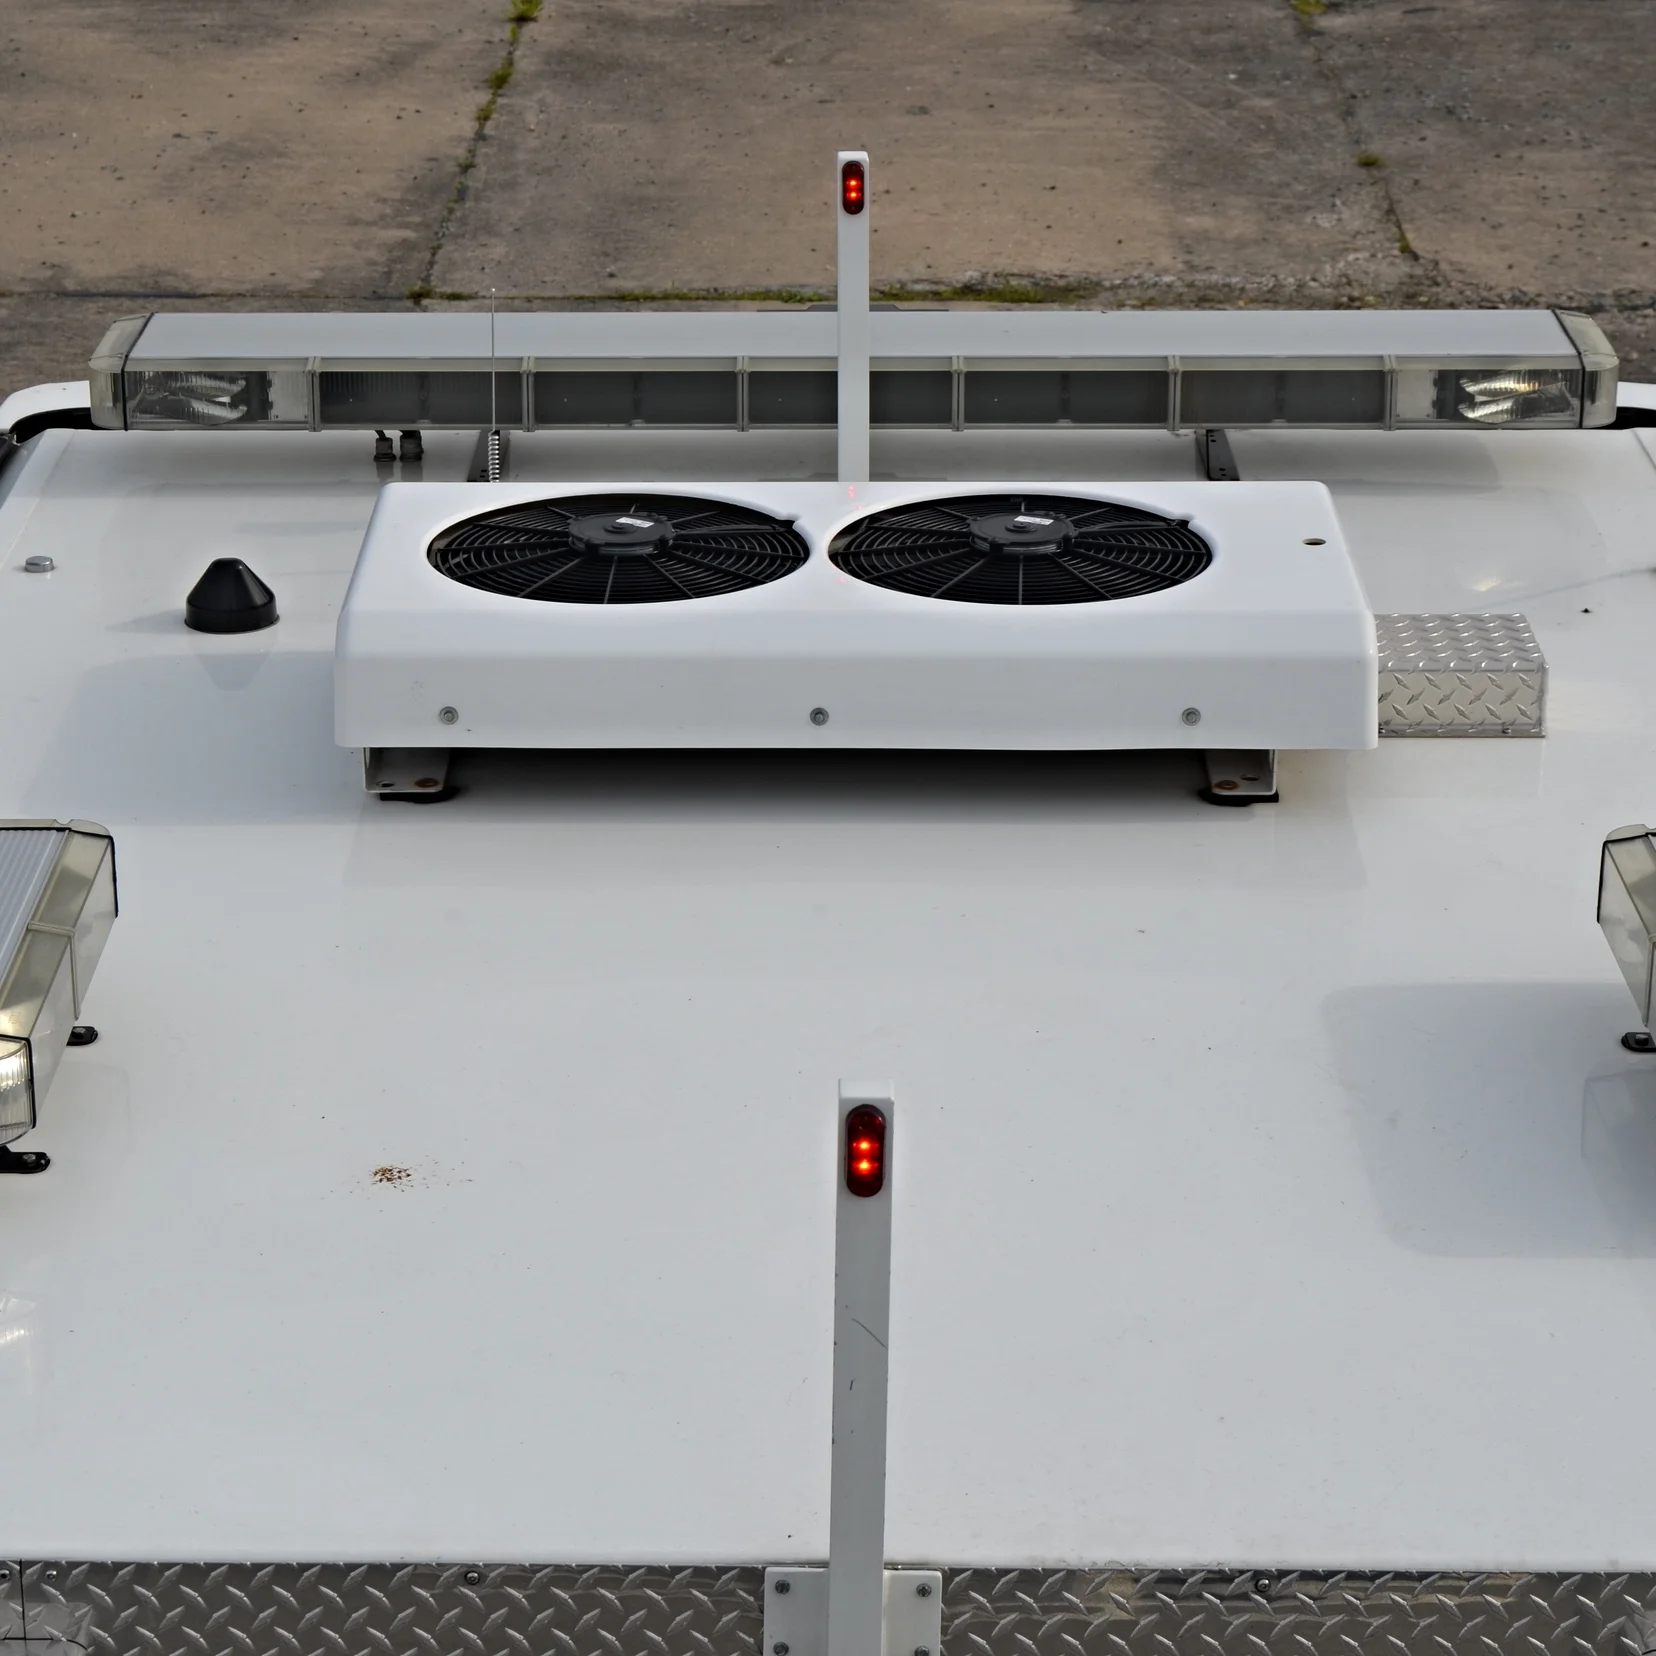
There are many different types of center markers offered by manufacturers. Generally the center marker is located somewhere on top of the tractor cab and has a light at the top providing illumination at night for the tiller operator.
EXAMPLES:


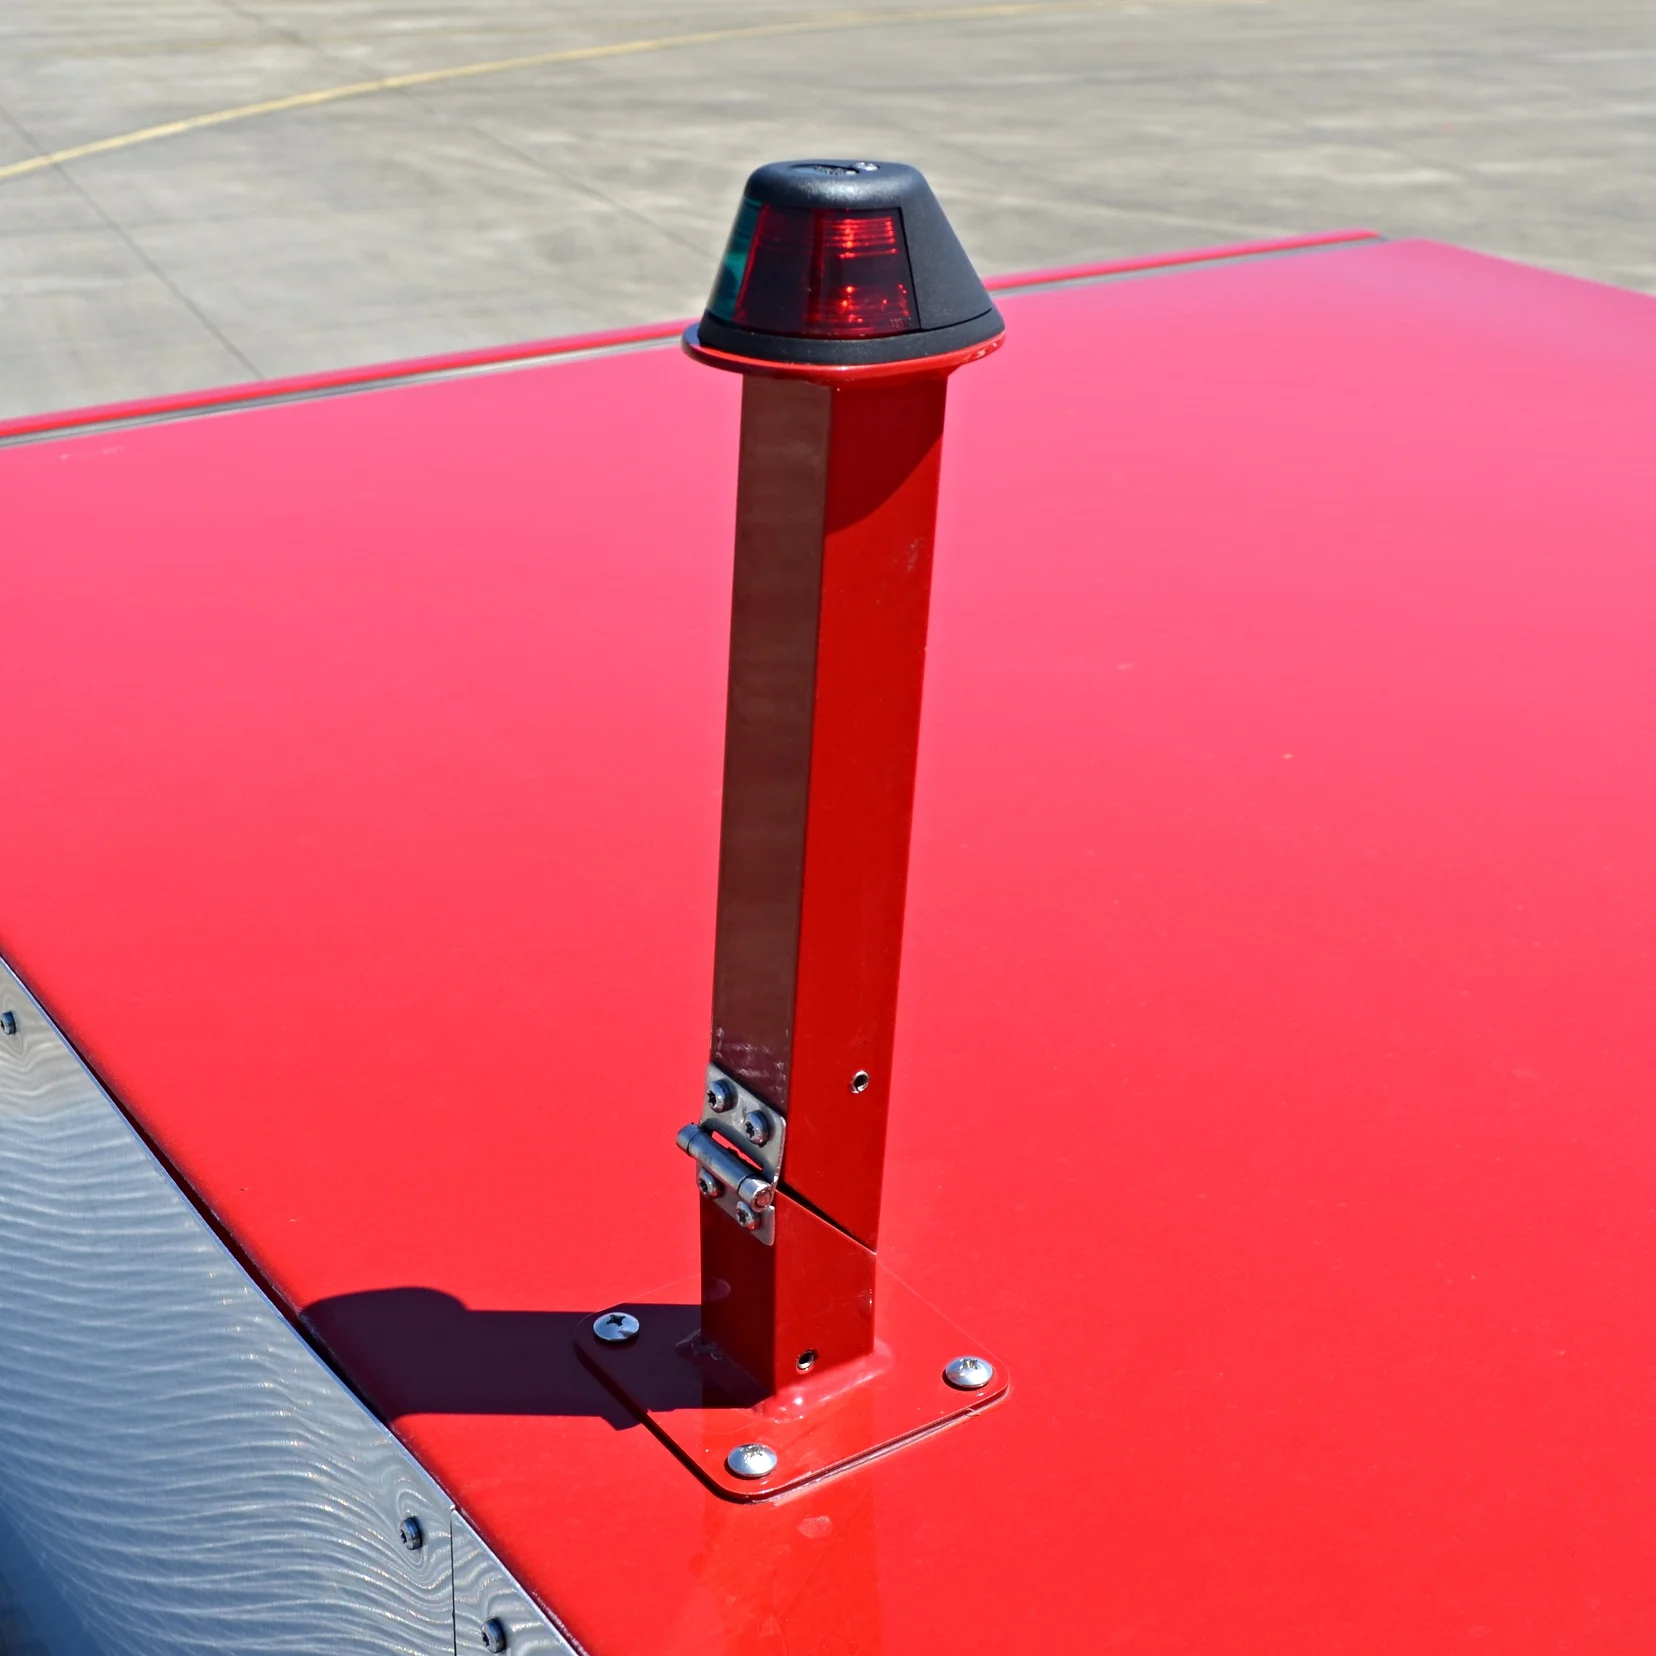
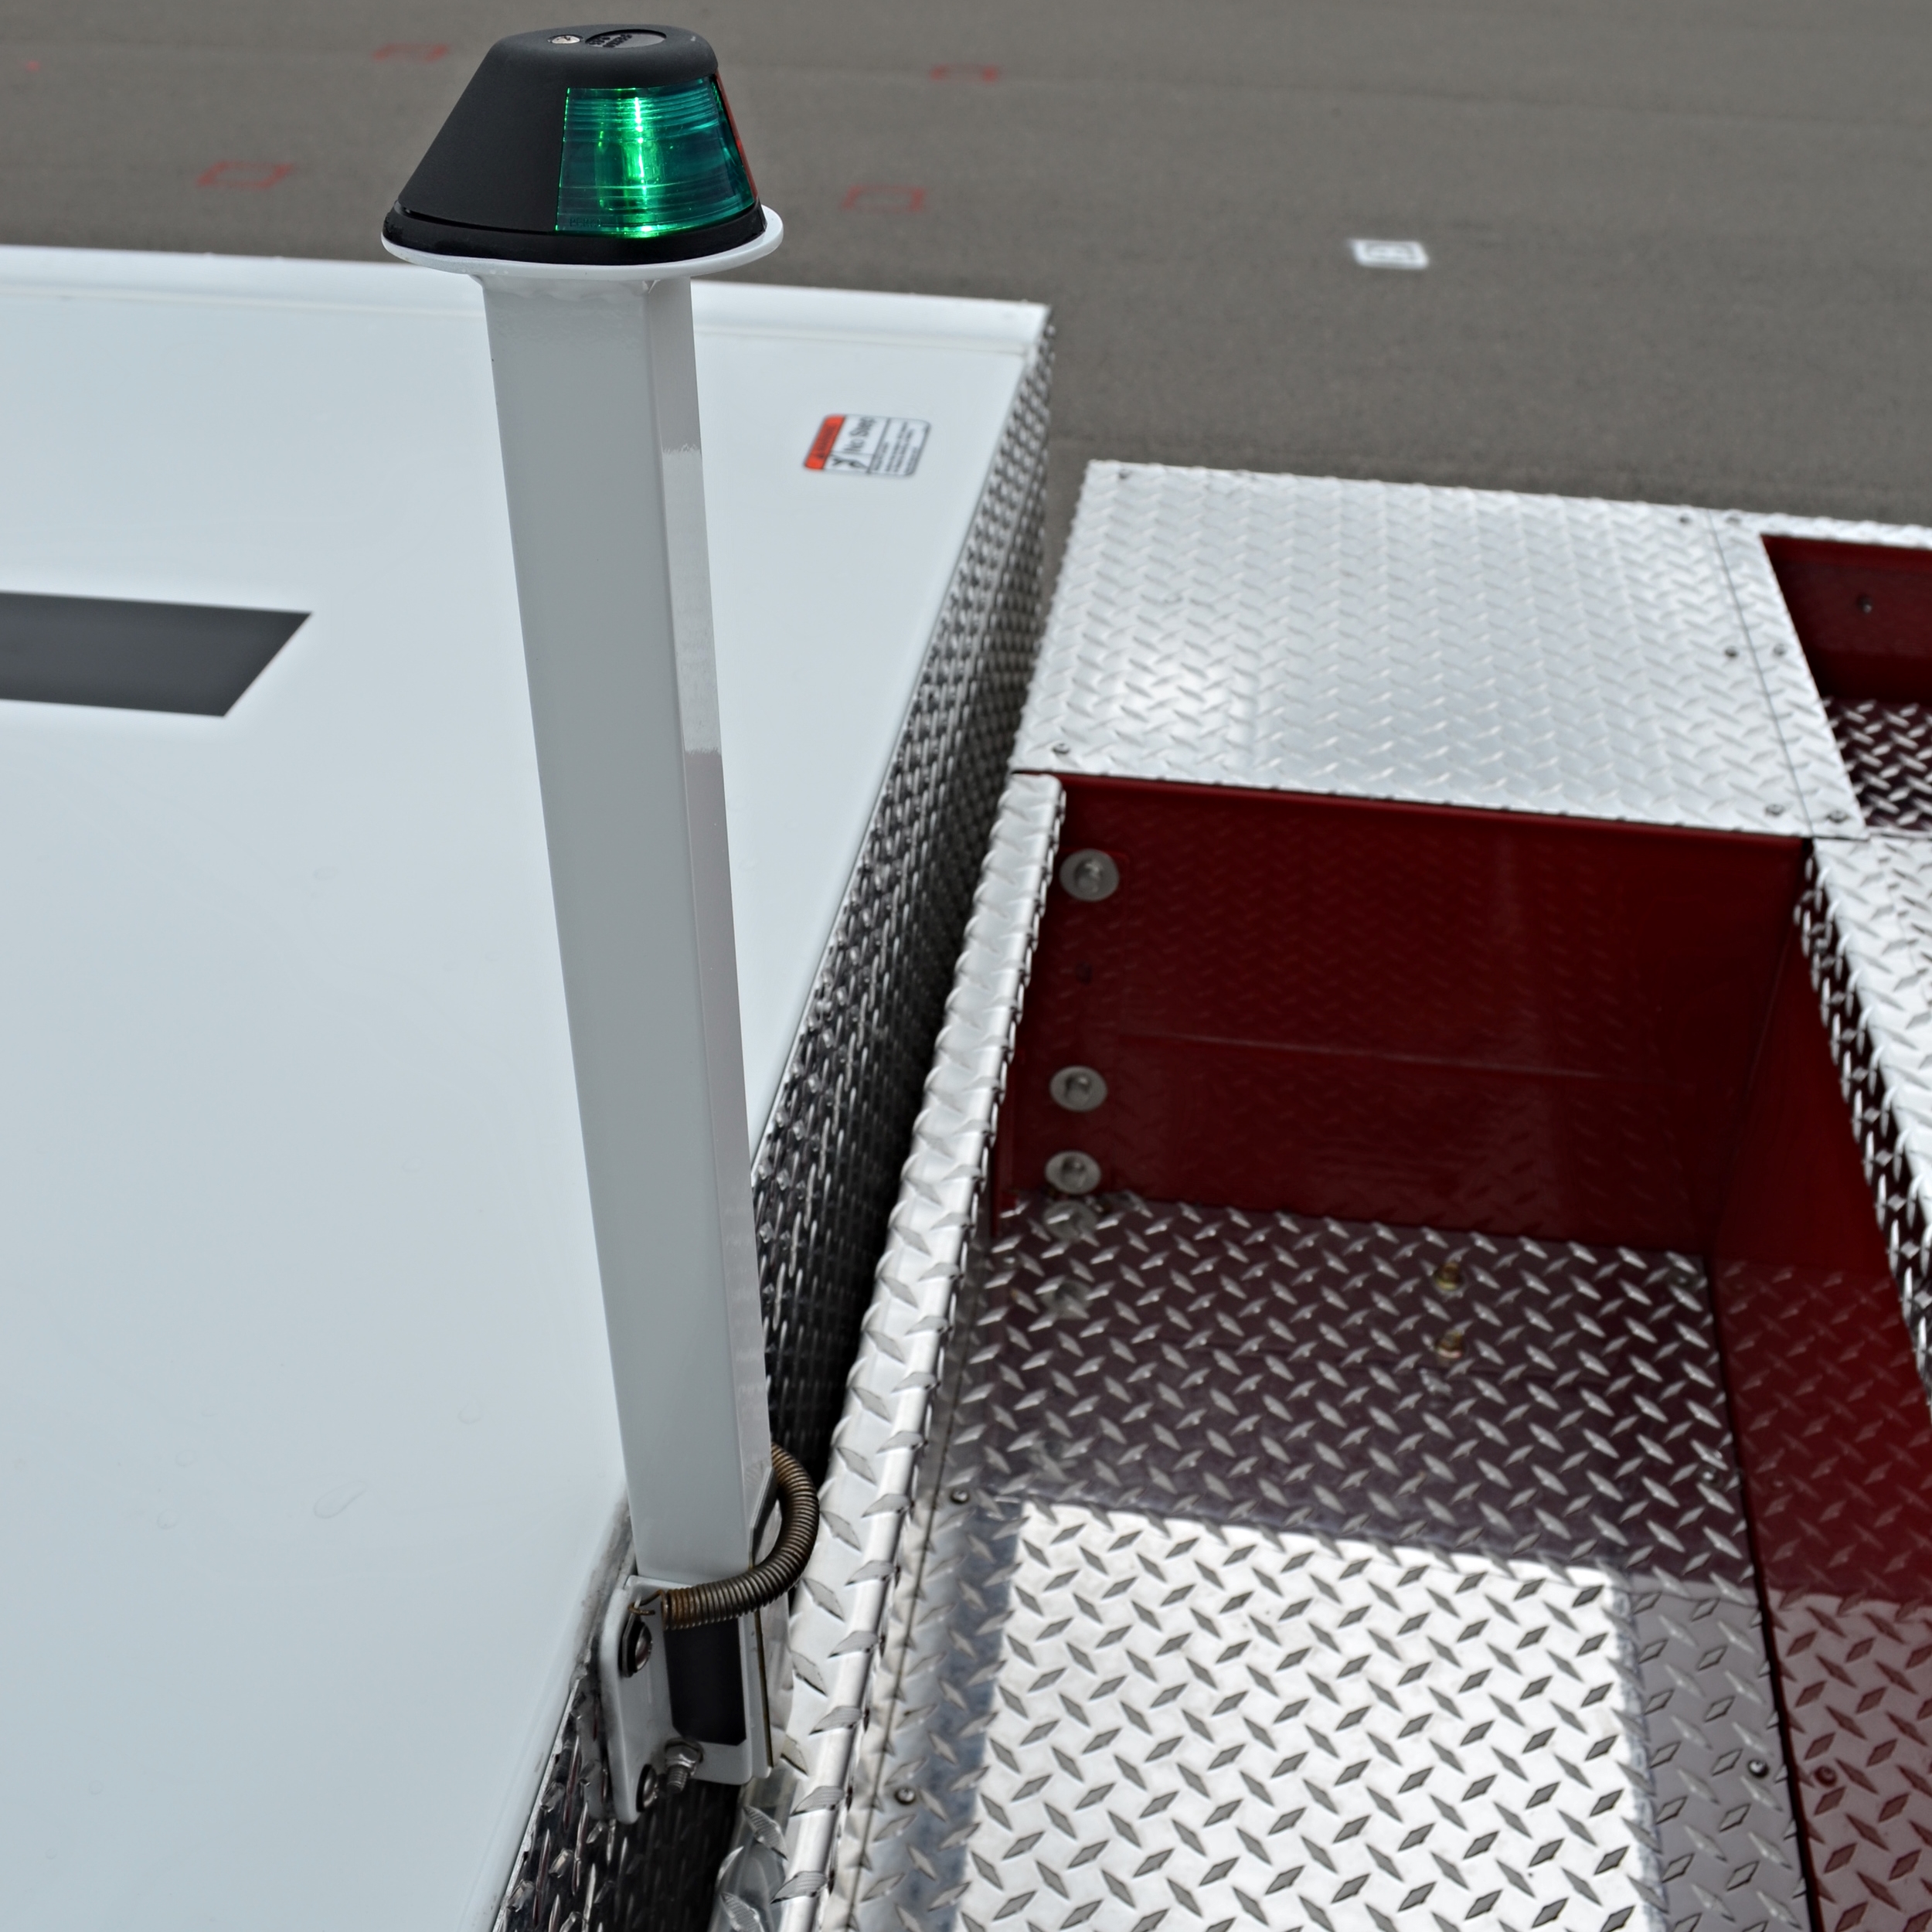
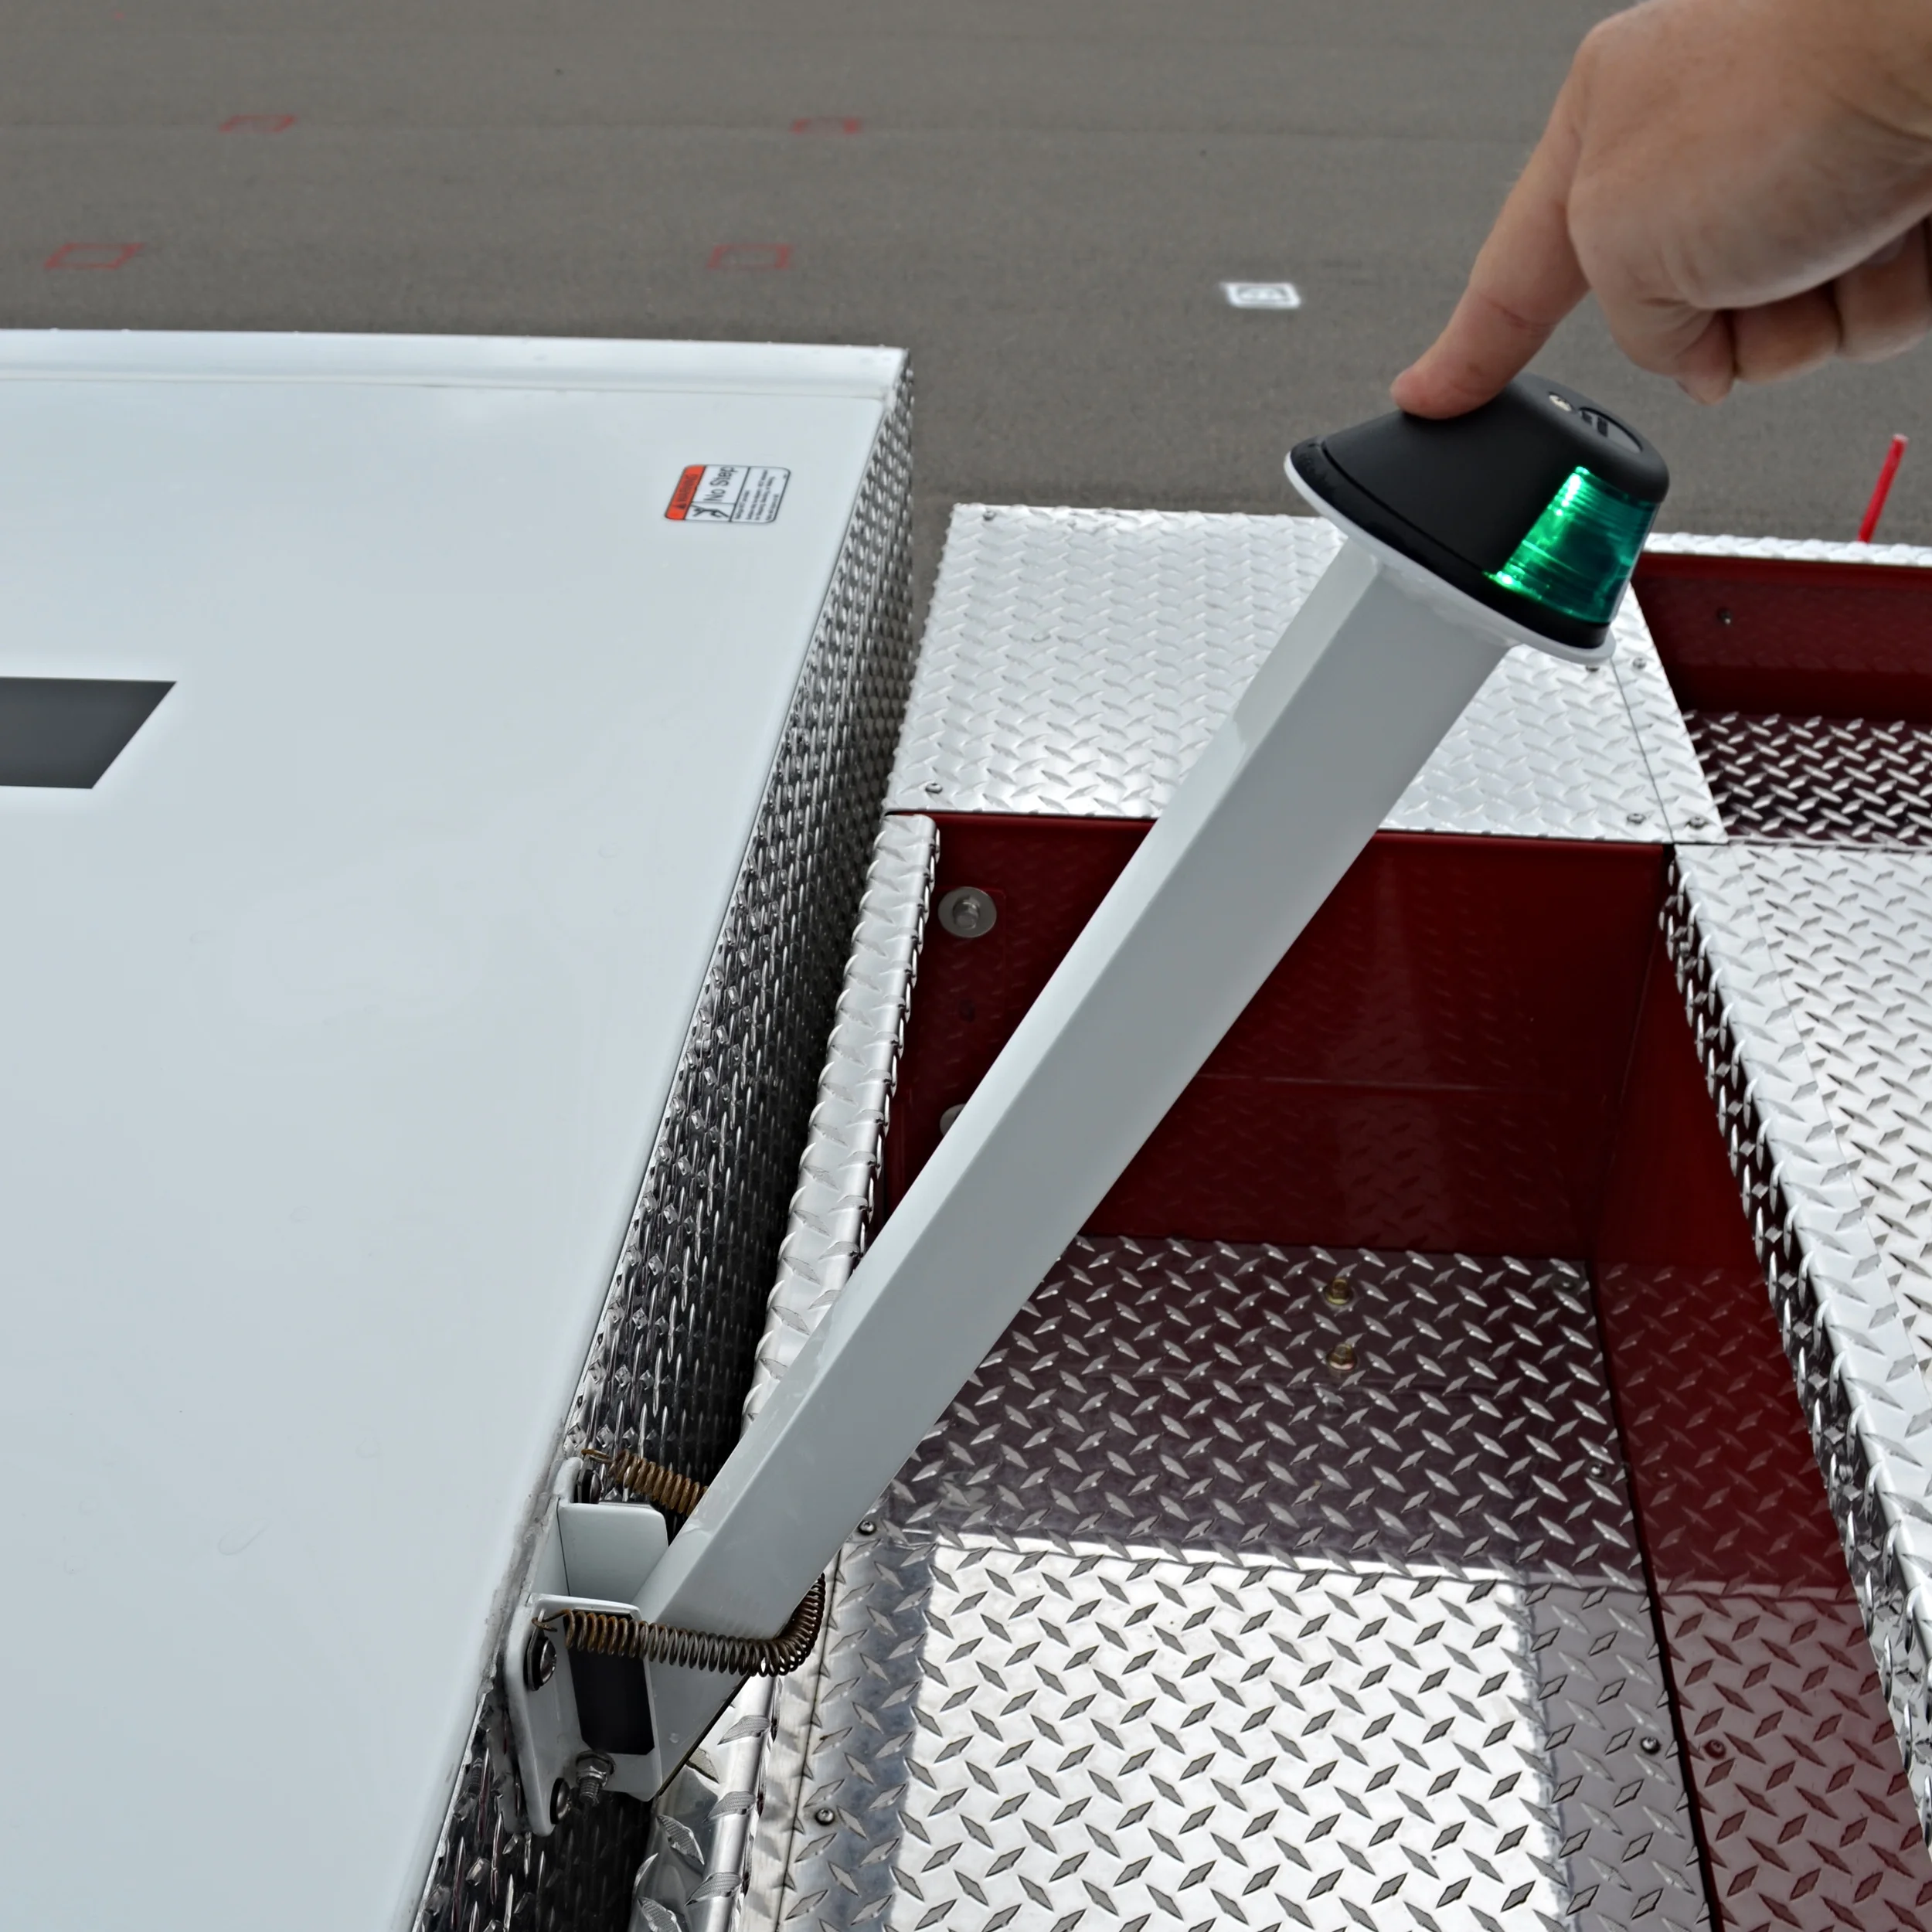
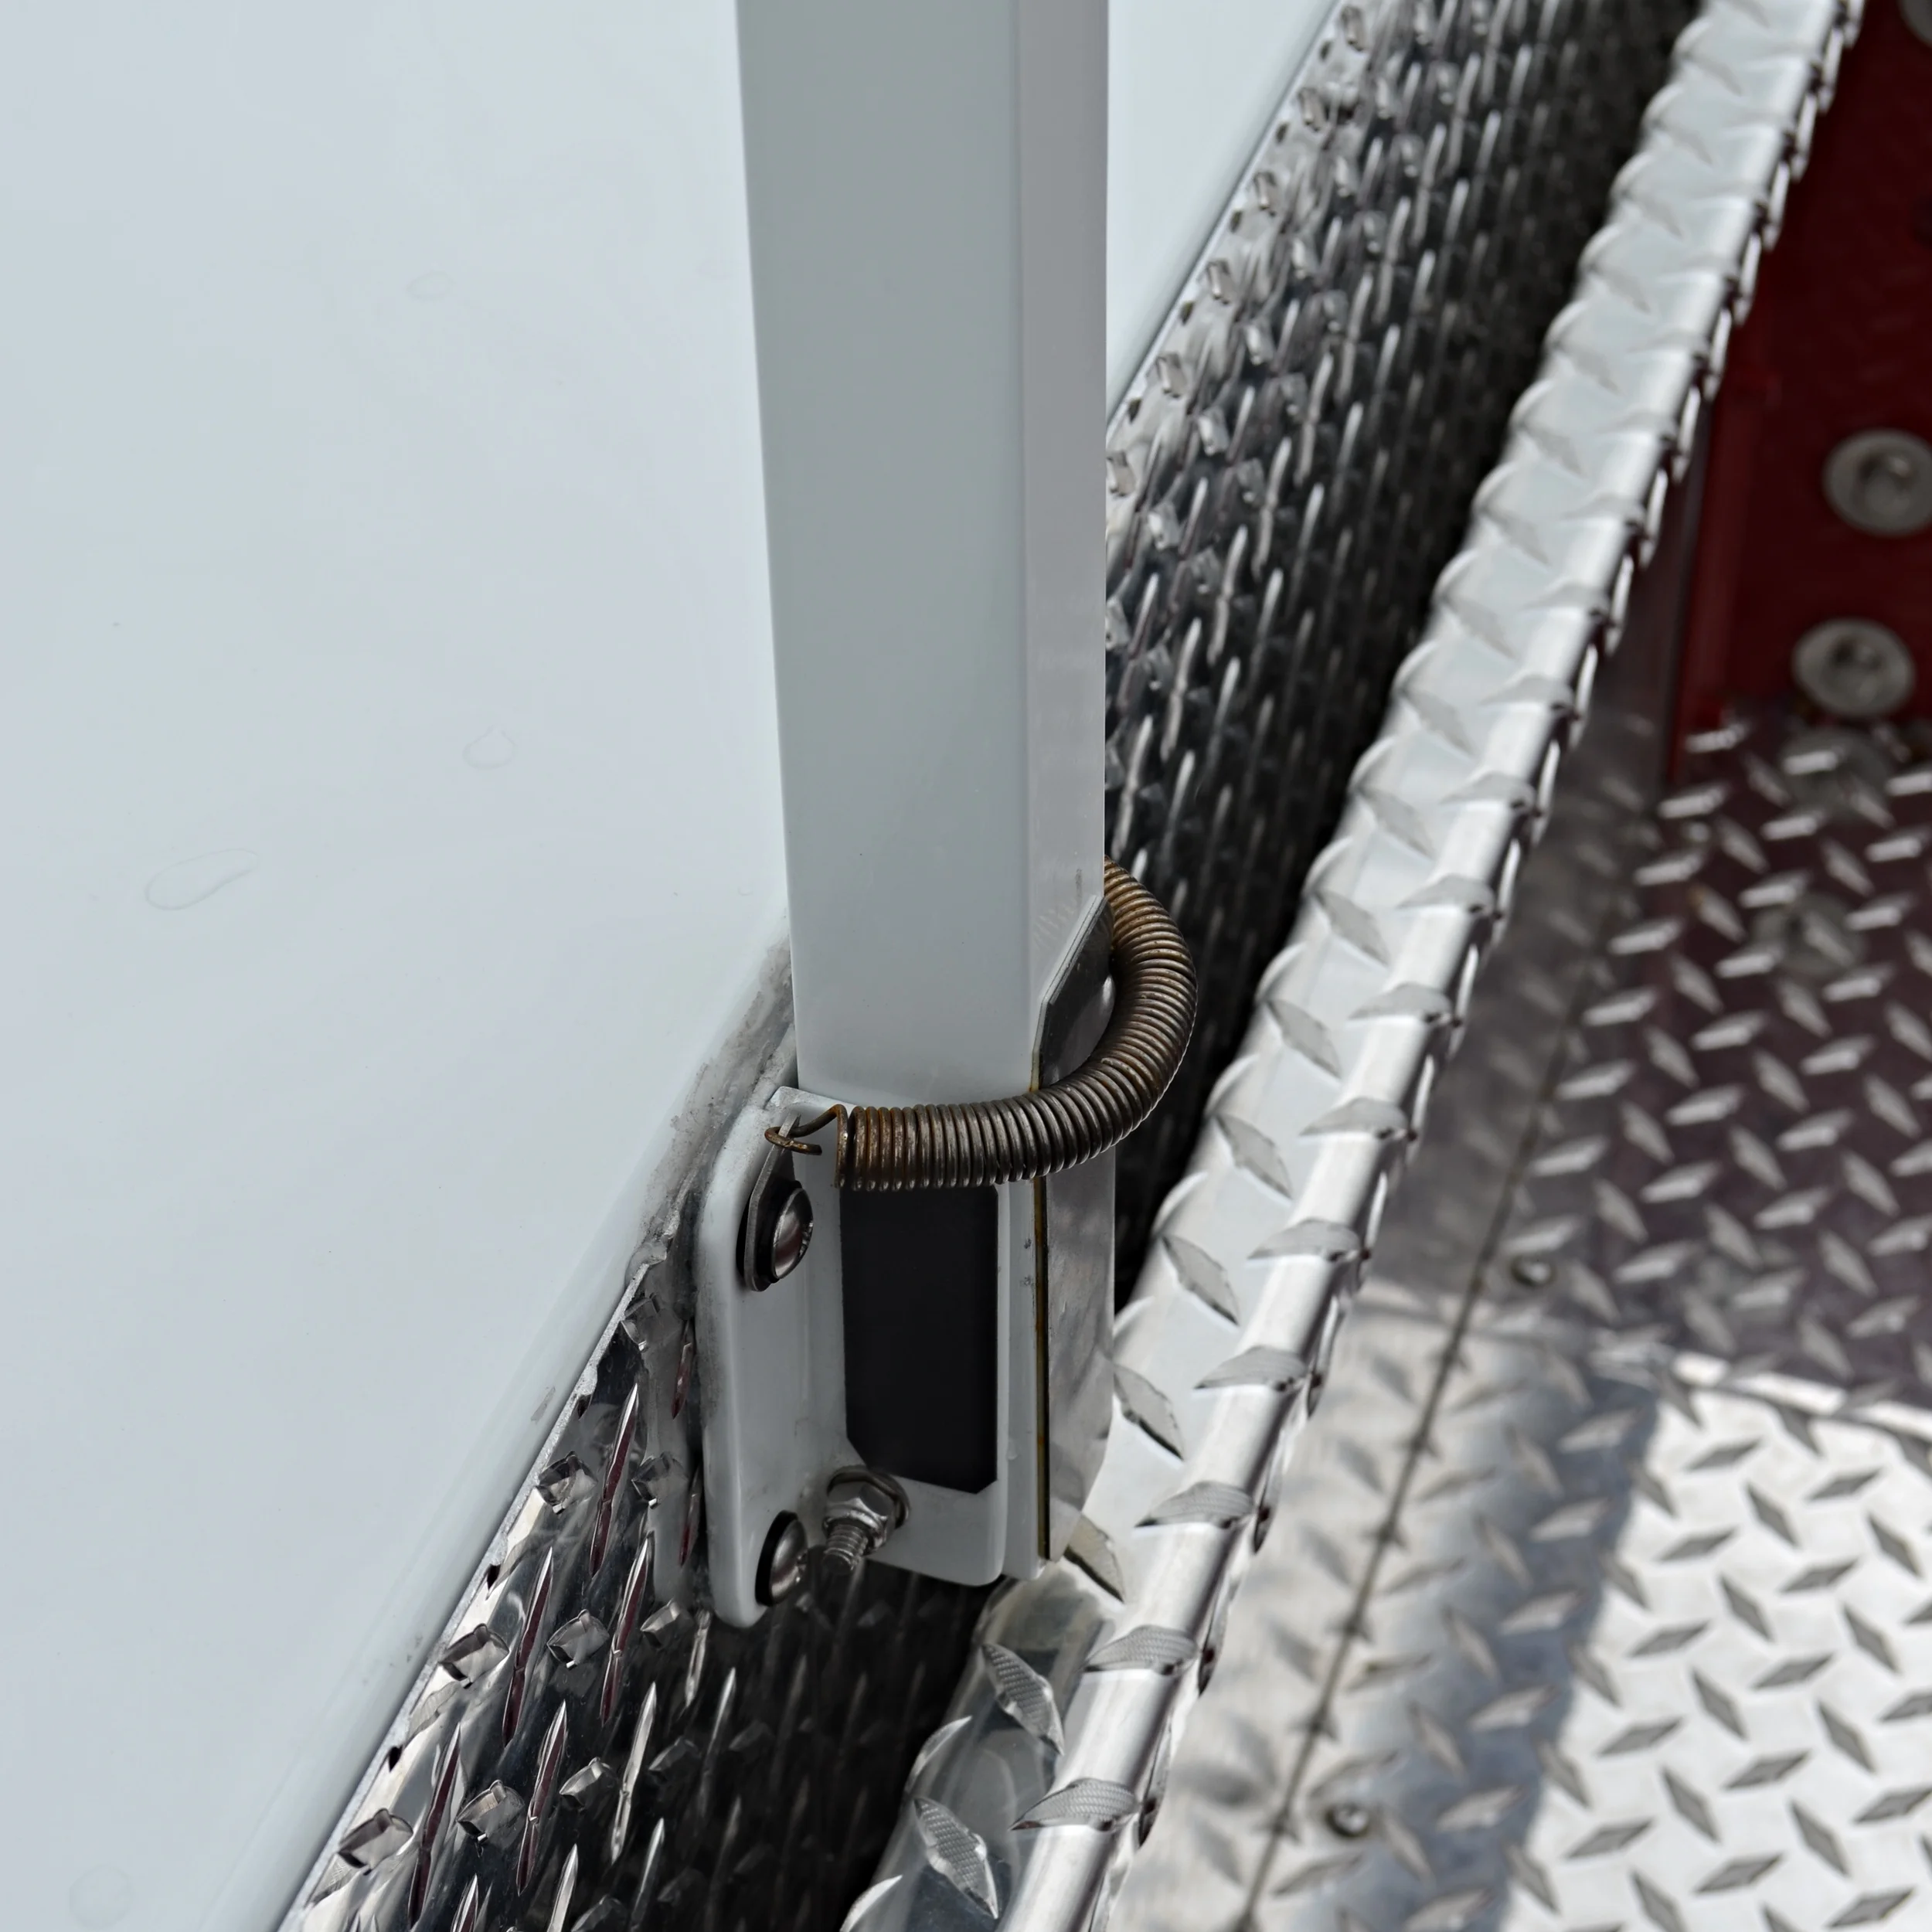
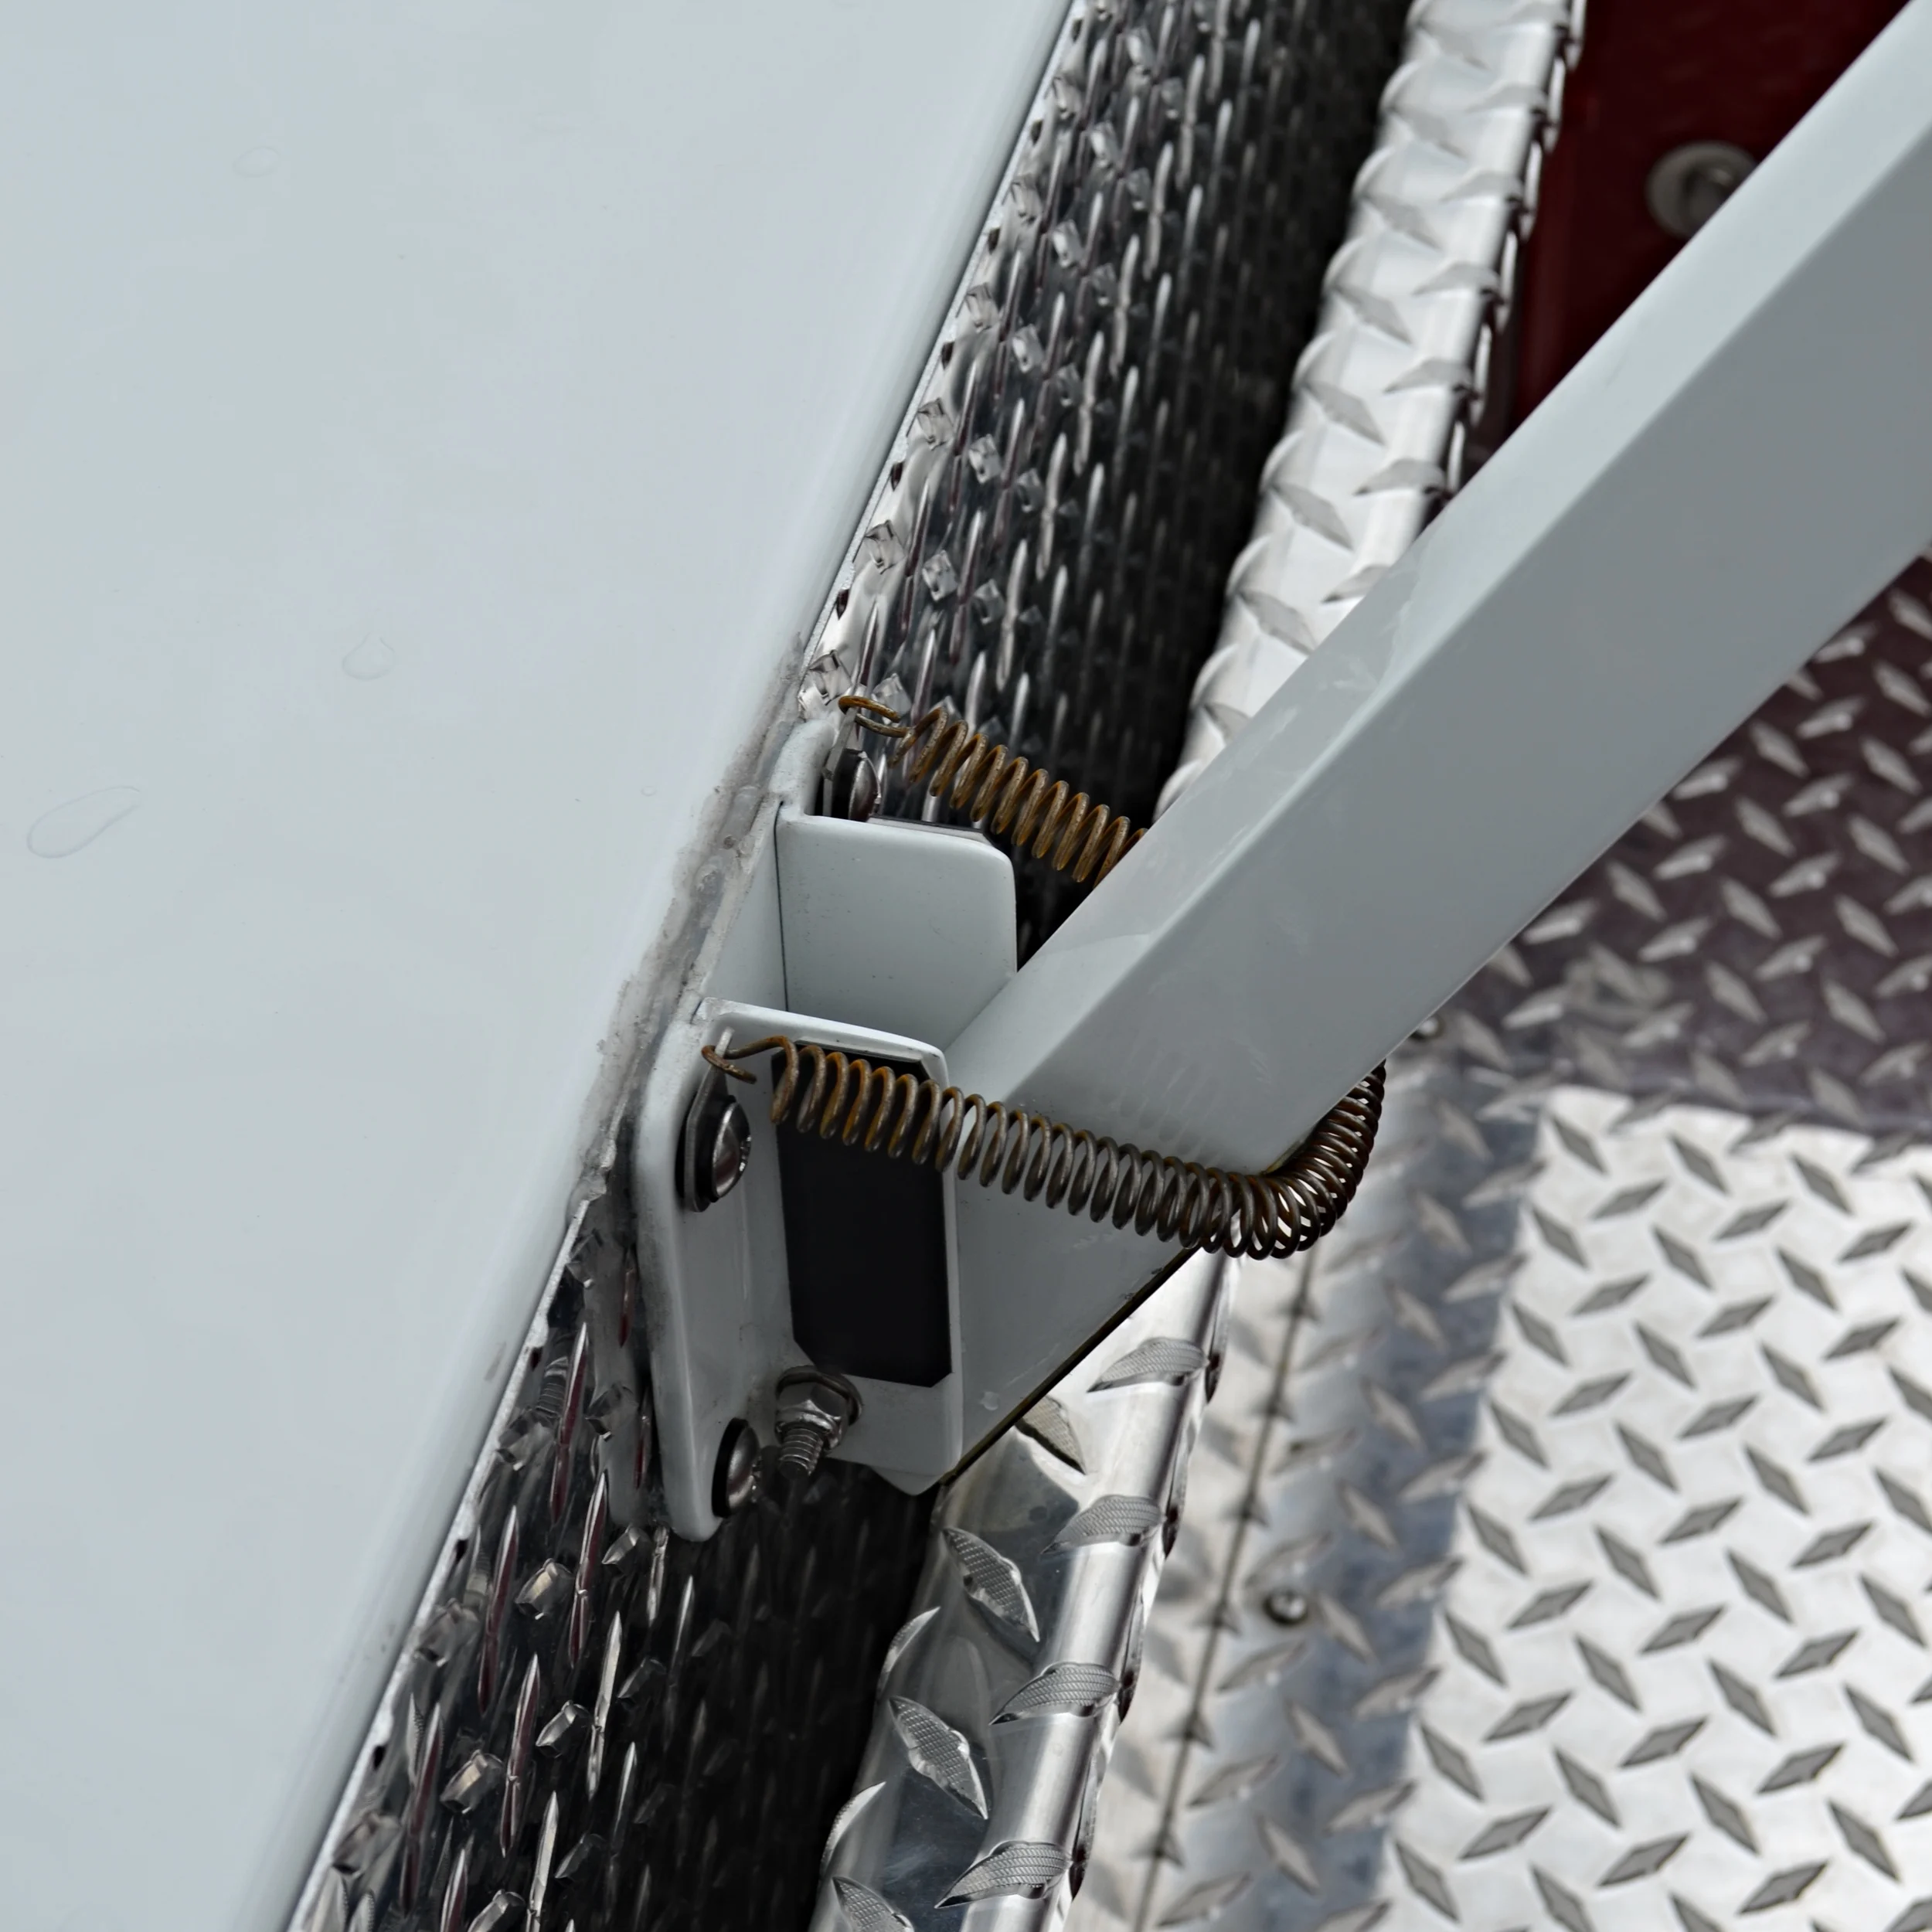
SPRING-LOADED CENTER MARKERS:
Because center markers are generally the highest point on top of the tractor cab, they can become snagged and are prone to getting bent or completely torn off. Some manufacturers offer a spring-loaded center marker allowing for the marker to bend freely and then return back to its original position without breaking. I have personally seen and used two different spring-loaded styles, one being an internal spring and the other external. Both designs had merit with different engineering features. I found the internal spring to be extremely strong and less likely to break over time. The external spring was a less complex design, with the spring easy to replace if it broke or wore out. (Click to enlarge)
INTERNAL SPRING EXAMPLE:


EXTERNAL SPRING EXAMPLE:
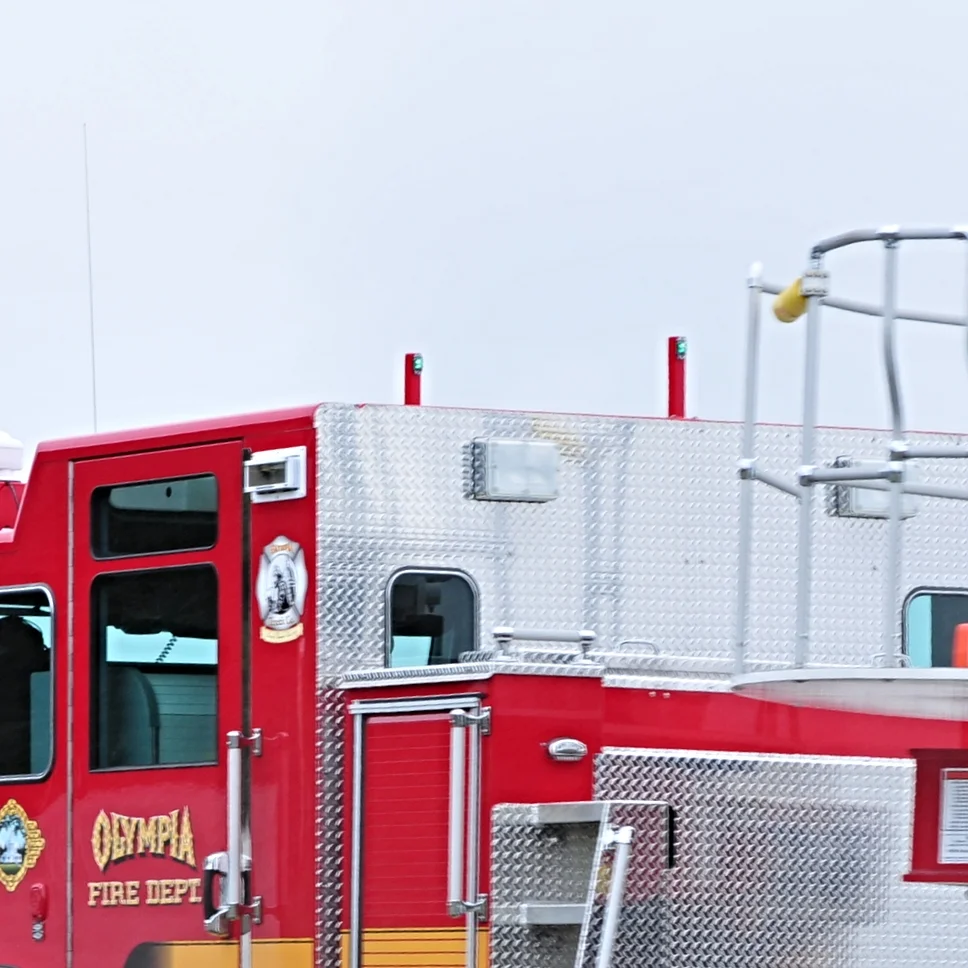
TWO CENTER MARKERS
Two center markers are used in tandem, one shorter and the other taller, with the shorter one sitting in front of the taller one. This design takes the guesswork out of determining that the trailer is in line. If the tractor and trailer are in the in-line position the tiller operator will only see one center marker. However if the tractor is turning, the tiller operator will see both tall and shorter center markers, indicating that the tractor drawn aerial is not in the in-line position. In the first picture below, you can see what appears to be one light on top of the center markers. In the second picture you can see two lights on both center markers, indicating that the trailer is no longer in the in-line position with the tractor. (Click to enlarge)


OTHER TYPES OF CENTER MARKERS
Other designs use completely different elements to accomplish judging the trailer's in-line position with the tractor. These designs focus on additional tools other than a center marker to allow the tiller operator to assess the in-line position.
LIGHT center MARKERs
EXAMPLE A:
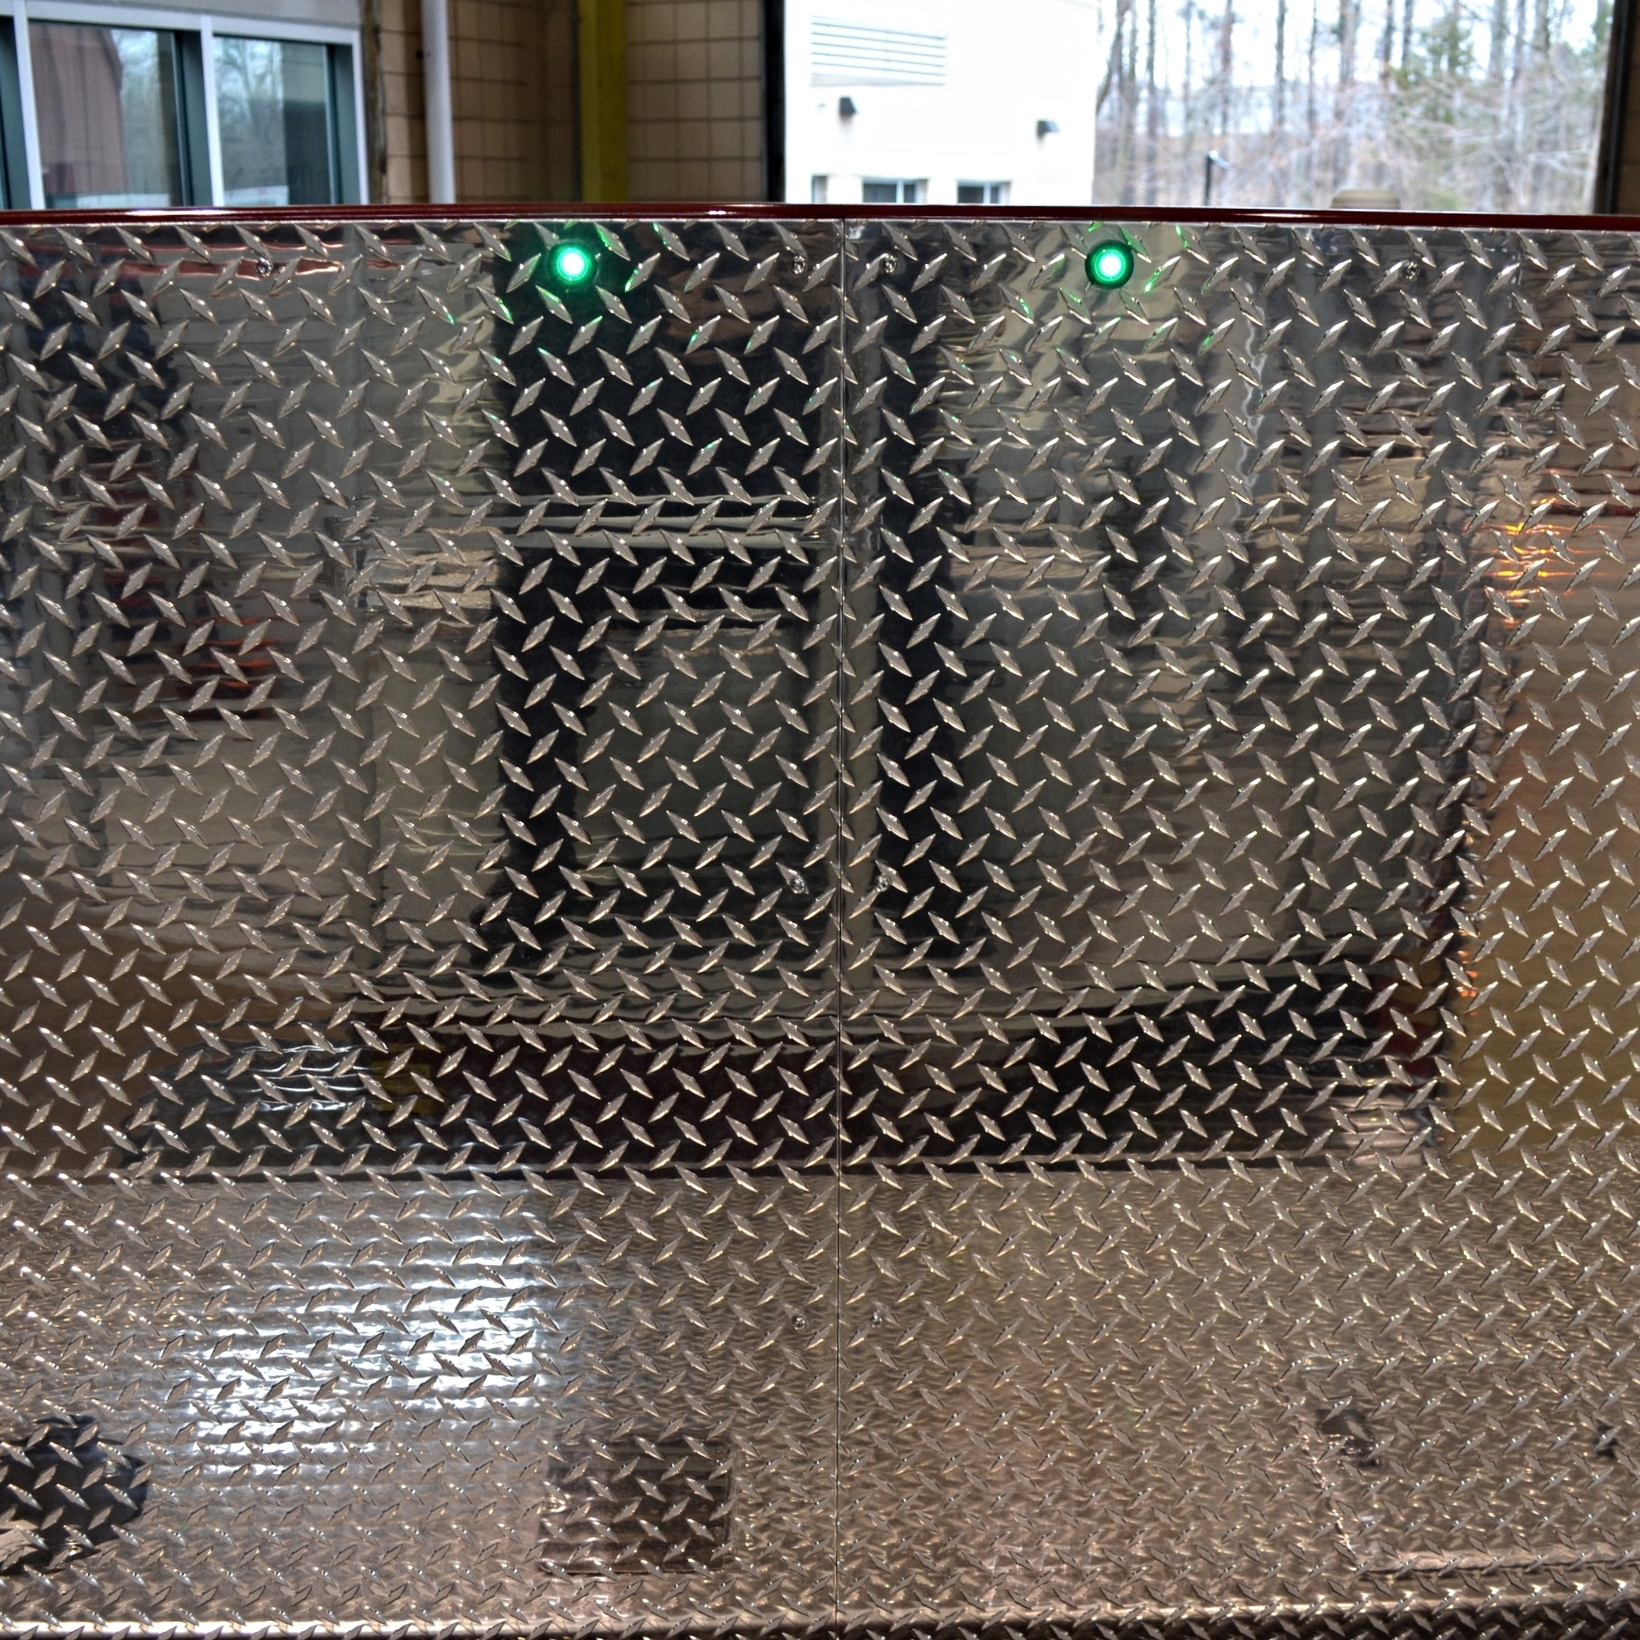
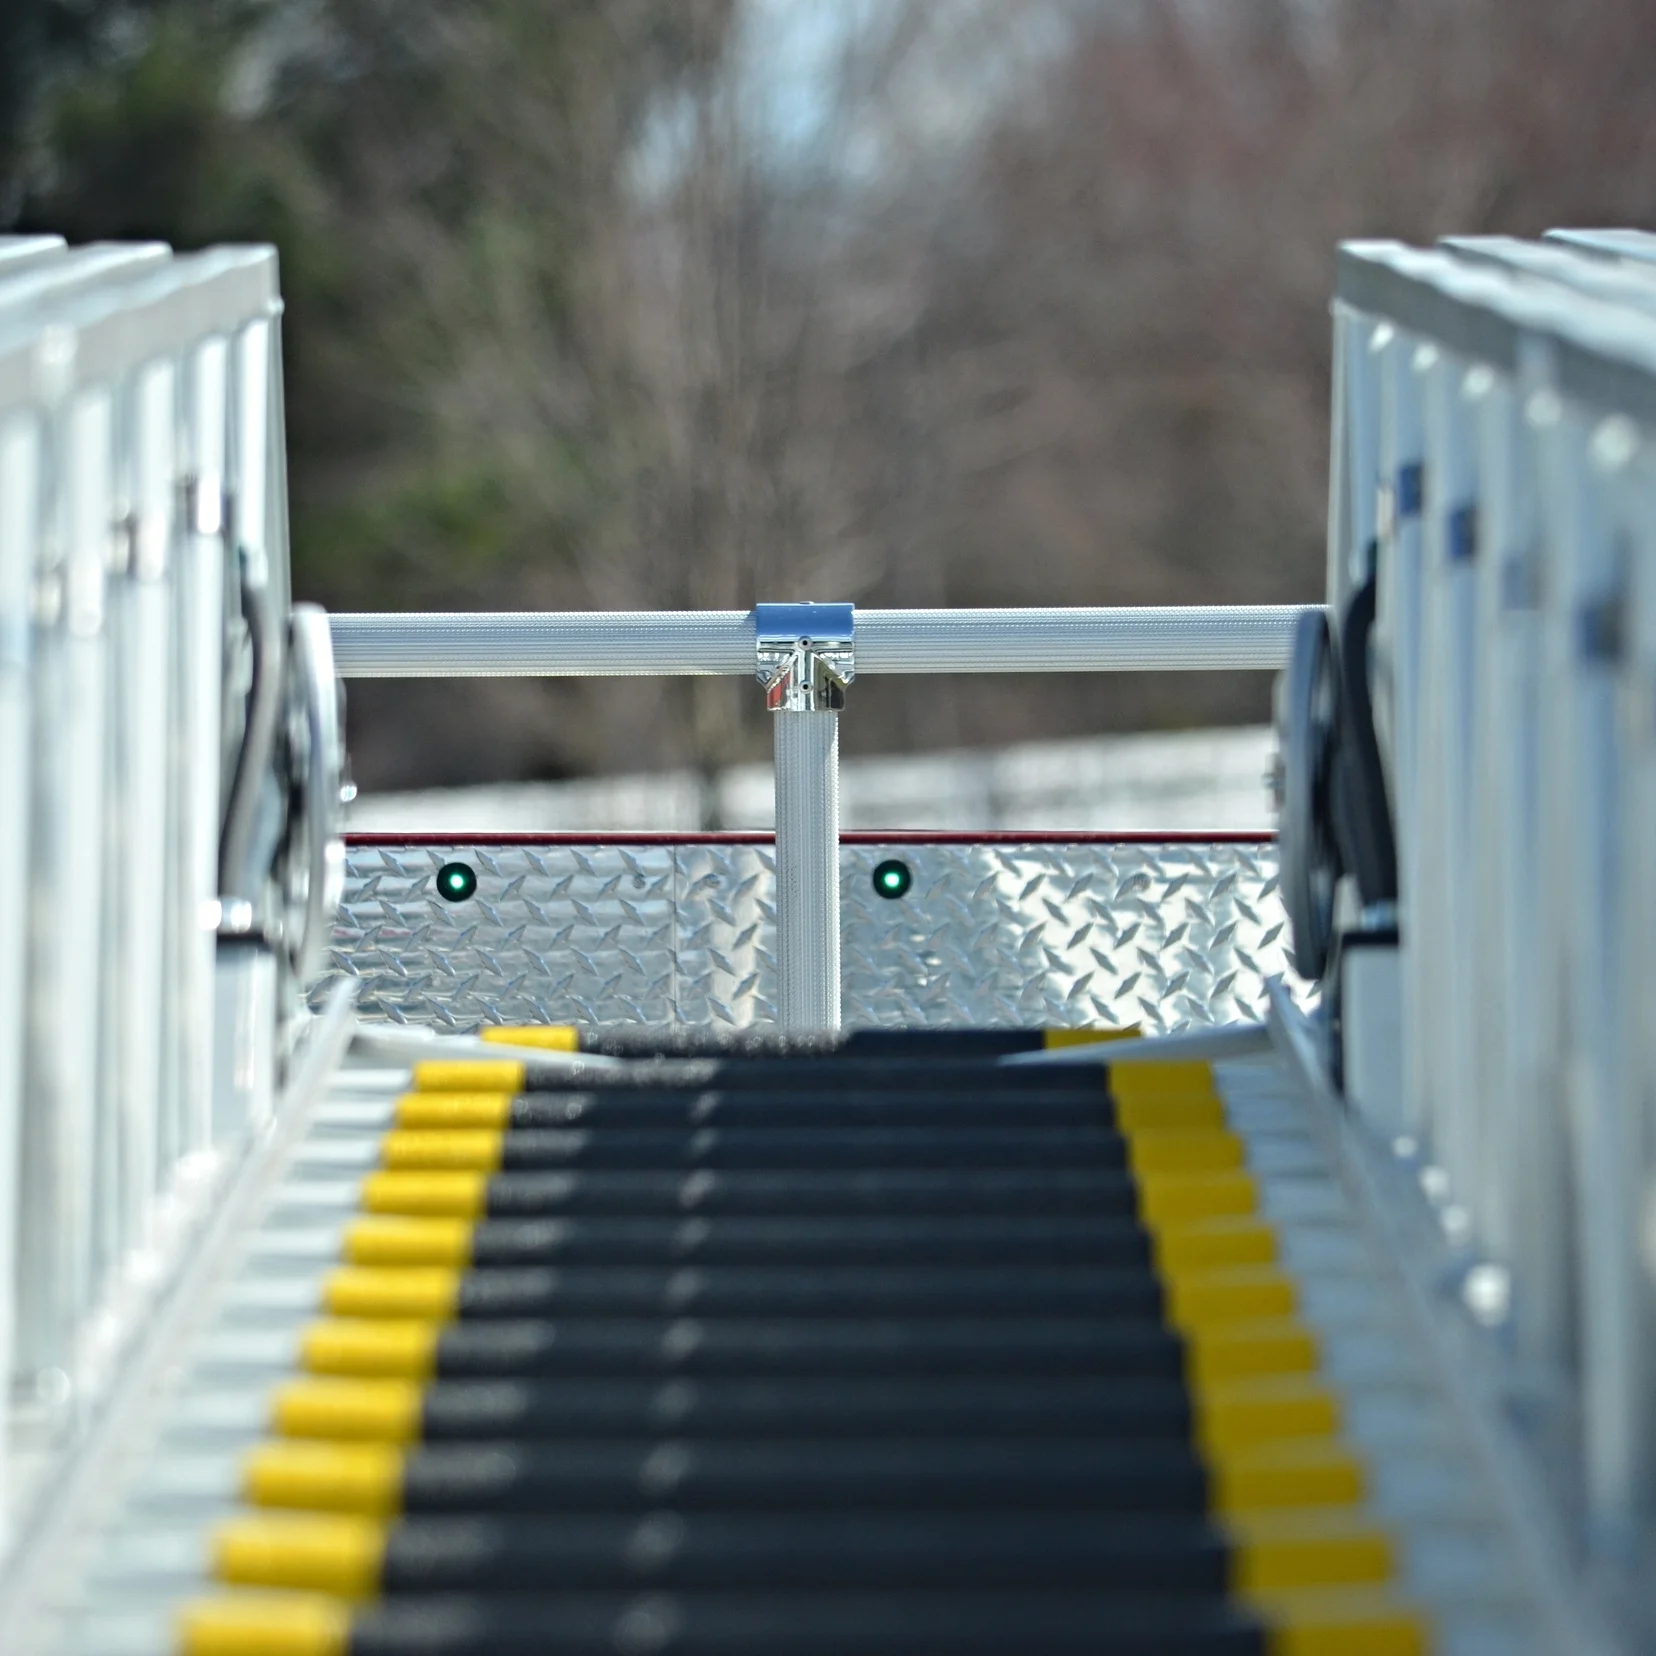
Some departments will design their apparatus with two lights on the back of the tractor's cab to act as the center markers. When the tractor and the trailer are in the in-line position, both lights will be positioned on the back of the cab directly lined up with both sections of the aerial's bed. When the tiller operator looks down the aerial towards the tractor, and sees each light in line with the bed of the aerial, then they know that the trailer is tracking straight with the tractor.
In the first picture below, you can see both green lights, indicating that the tractor and trailer are in the in-line position. The second picture illustrates that the trailer is not in the in-line position with the tractor because you can only see one of the two lights.
Depending on the type of light you choose, it’s important to evaluate the brightness of these lights. Some lights can be quite bright and become a distraction for the tiller operator at night.
One advantage for this type of design is that it alleviates the potential hazard of an overhead obstacle hitting and damaging the type of center markers that are attached to the top of the tractor's cab. (Click to enlarge)

EXAMPLE b:
In this example, this department chose to use two small lights on the back of the cab, positioned evenly between the bed of the aerial. Because the bracing bar for the handrail is positioned dead center between the aerial on the turntable, the two lights were located on each side of the bracing bar.
The tiller operator uses these landmarks as reference points to indicate that the trailer is in the in-line position with the tractor. In the second picture, you can see that the two green lights are evenly spaced between these landmarks. The third picture shows that the two lights between the aerial are positioned more to the left, which would tell you that the trailer is not in the in-line position with the tractor.
This design may not be initially as intuitive for the tiller operator when learning how to position the trailer in the in-line position with the tractor. However, over time the tiller operator will build spatial awareness within these landmarks.

OTHER TYPES OF CENTER MARKERS
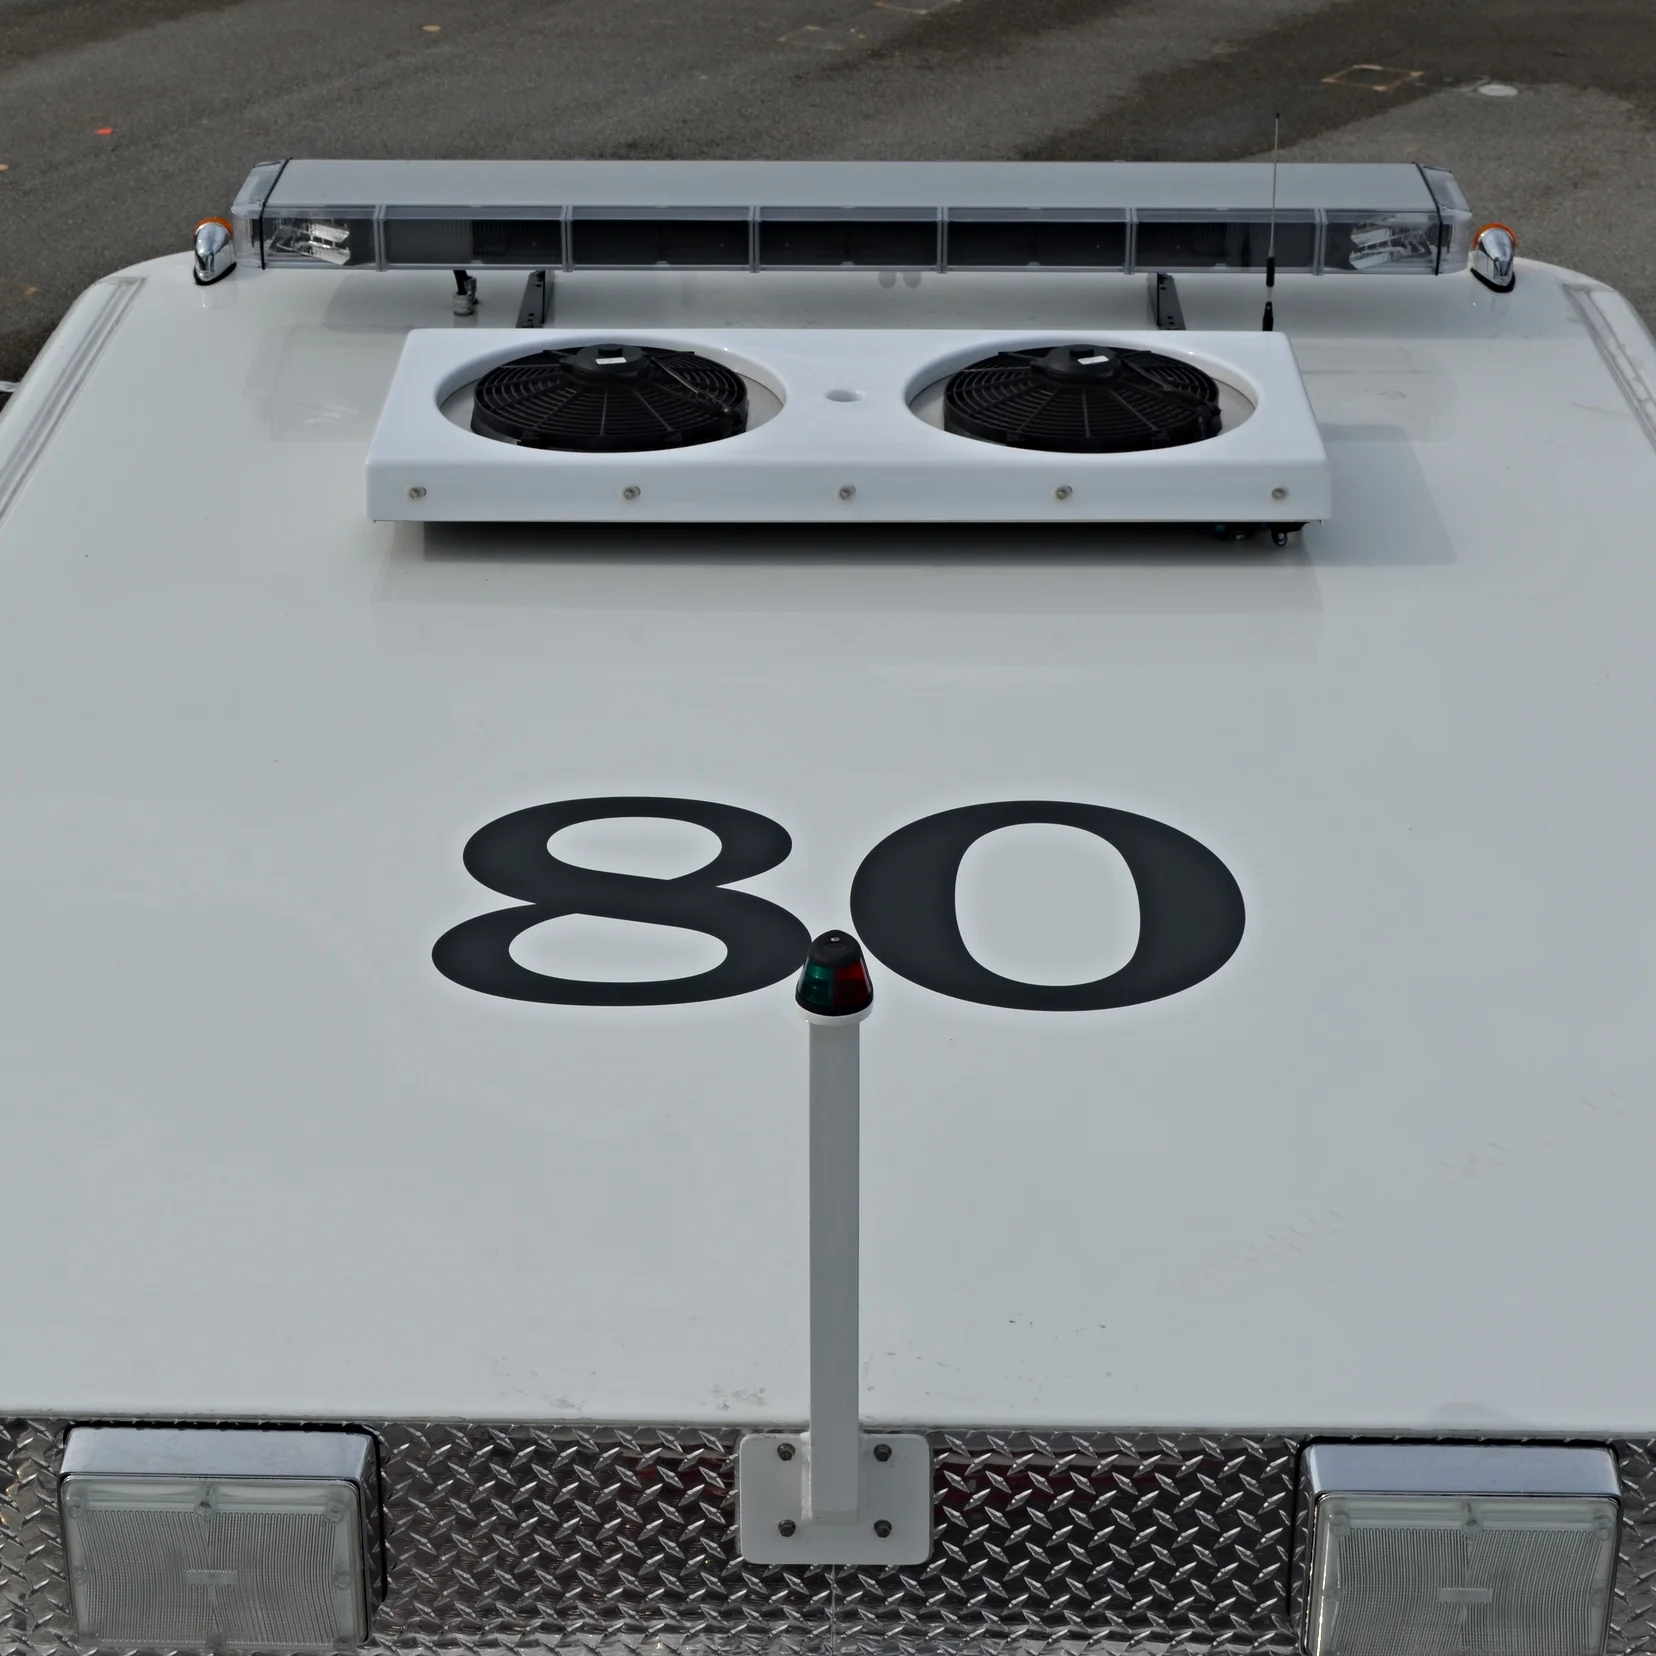
example A:
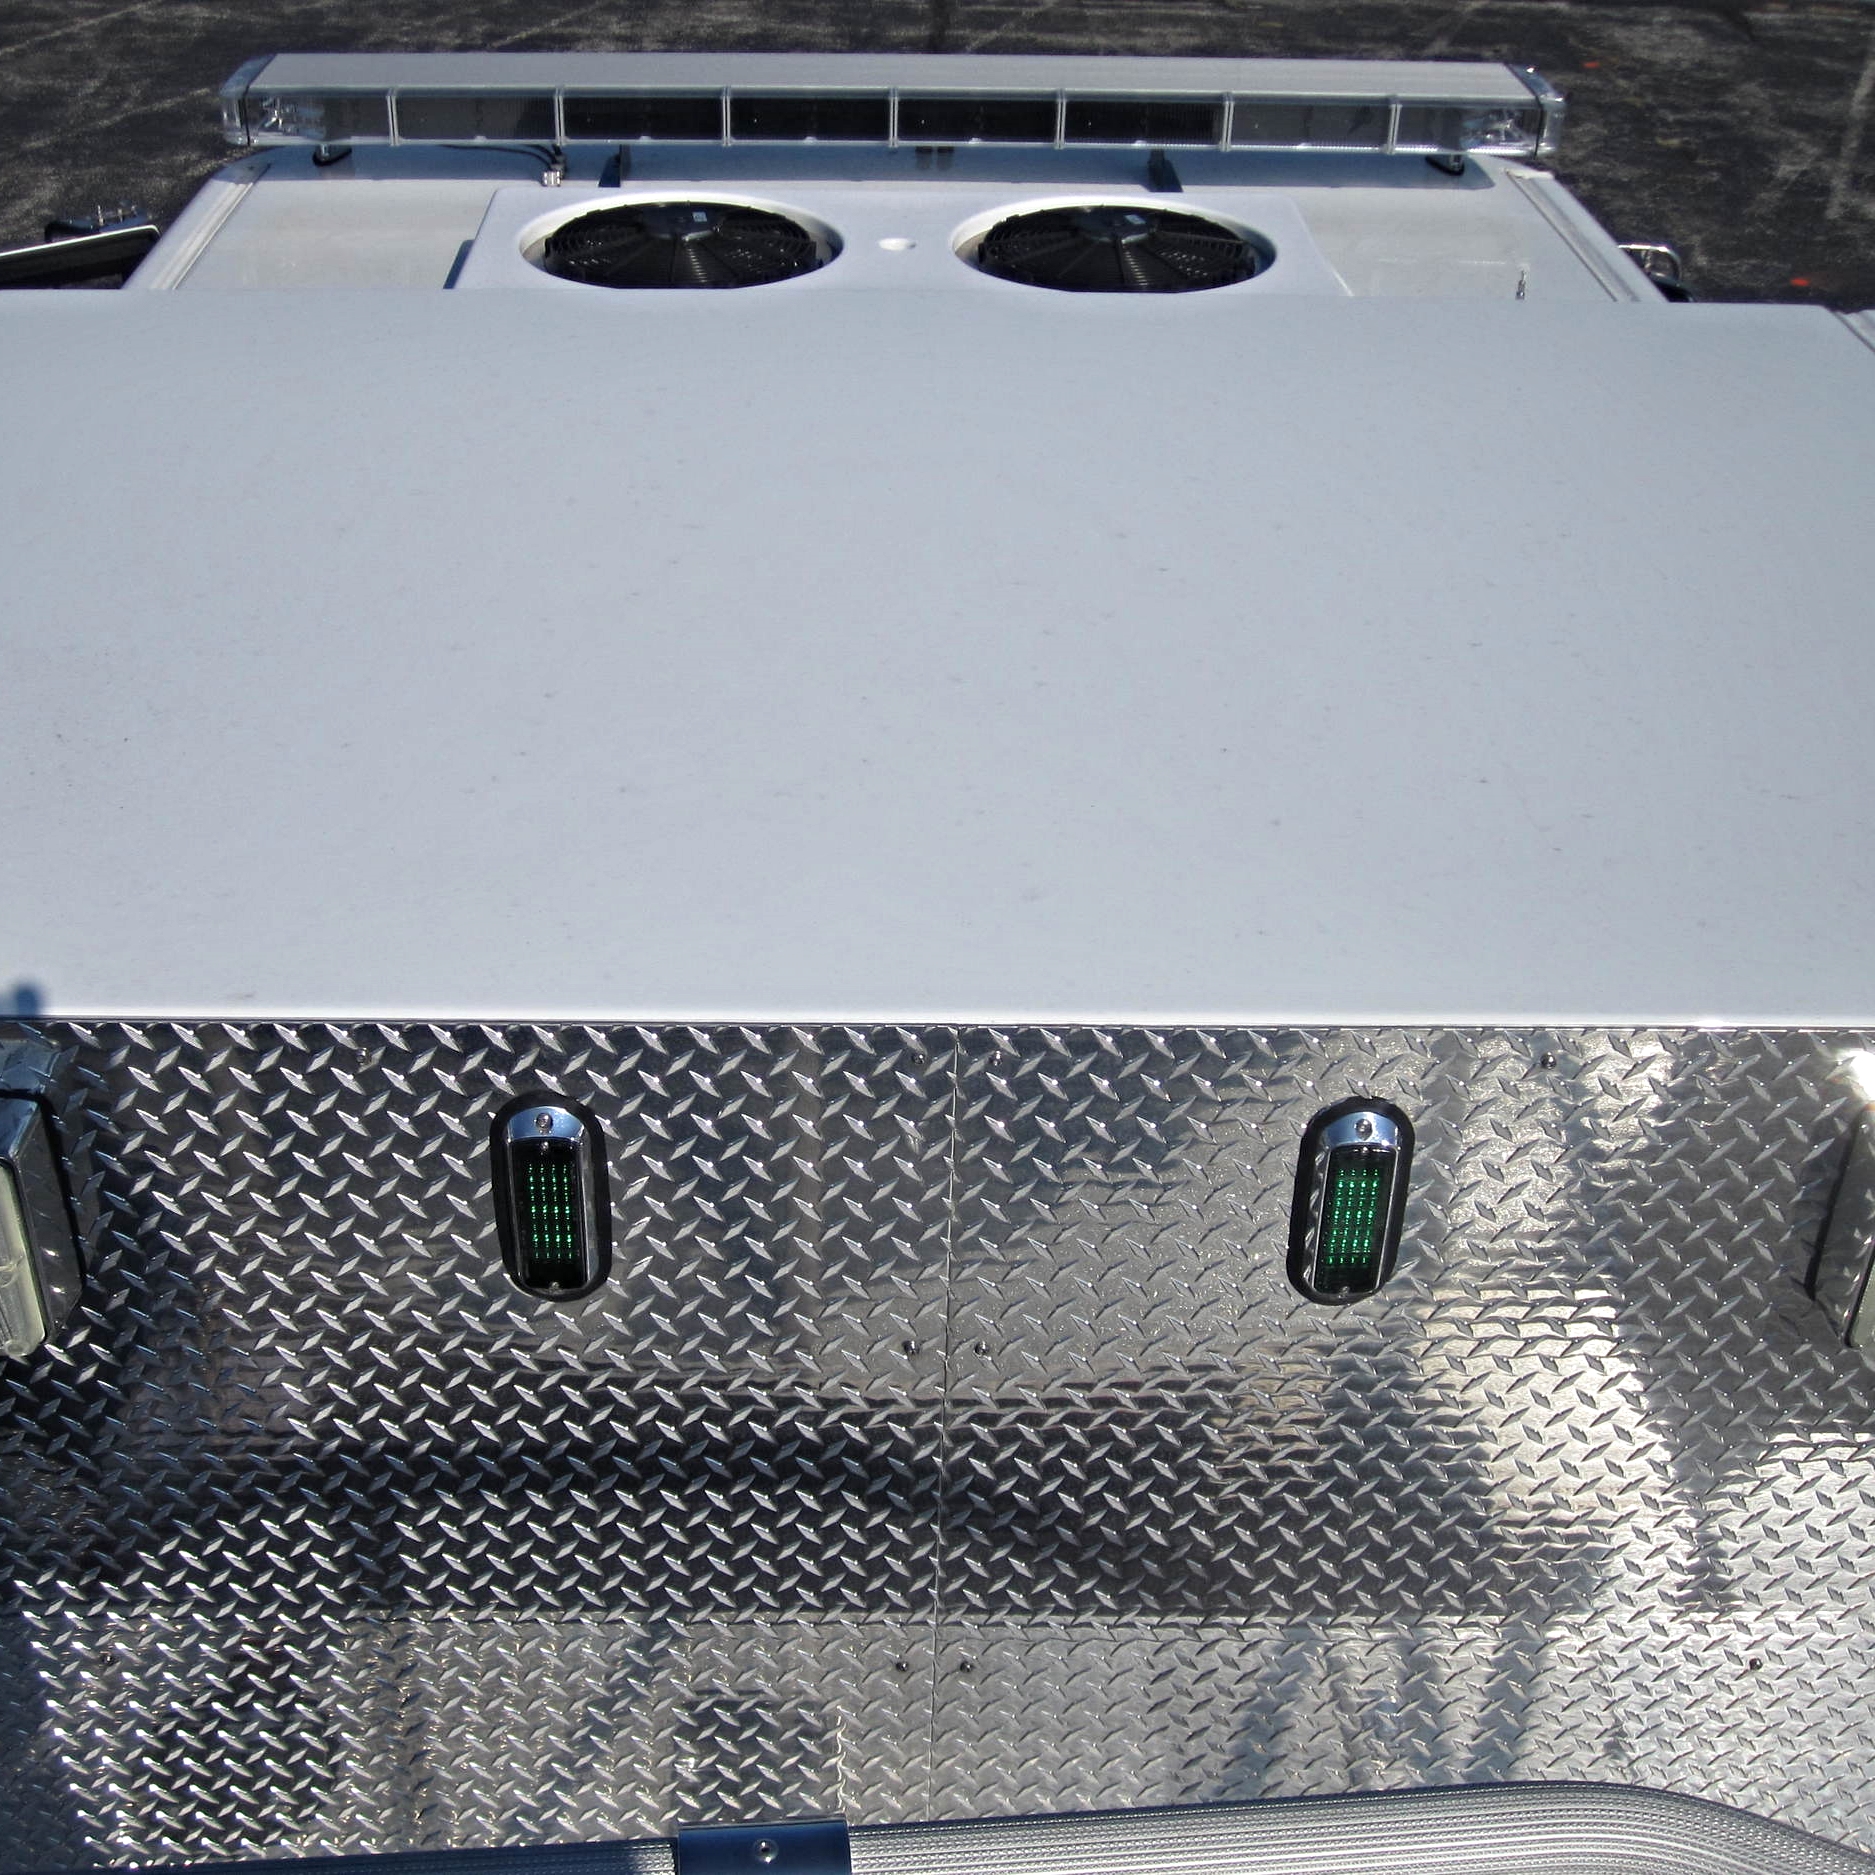
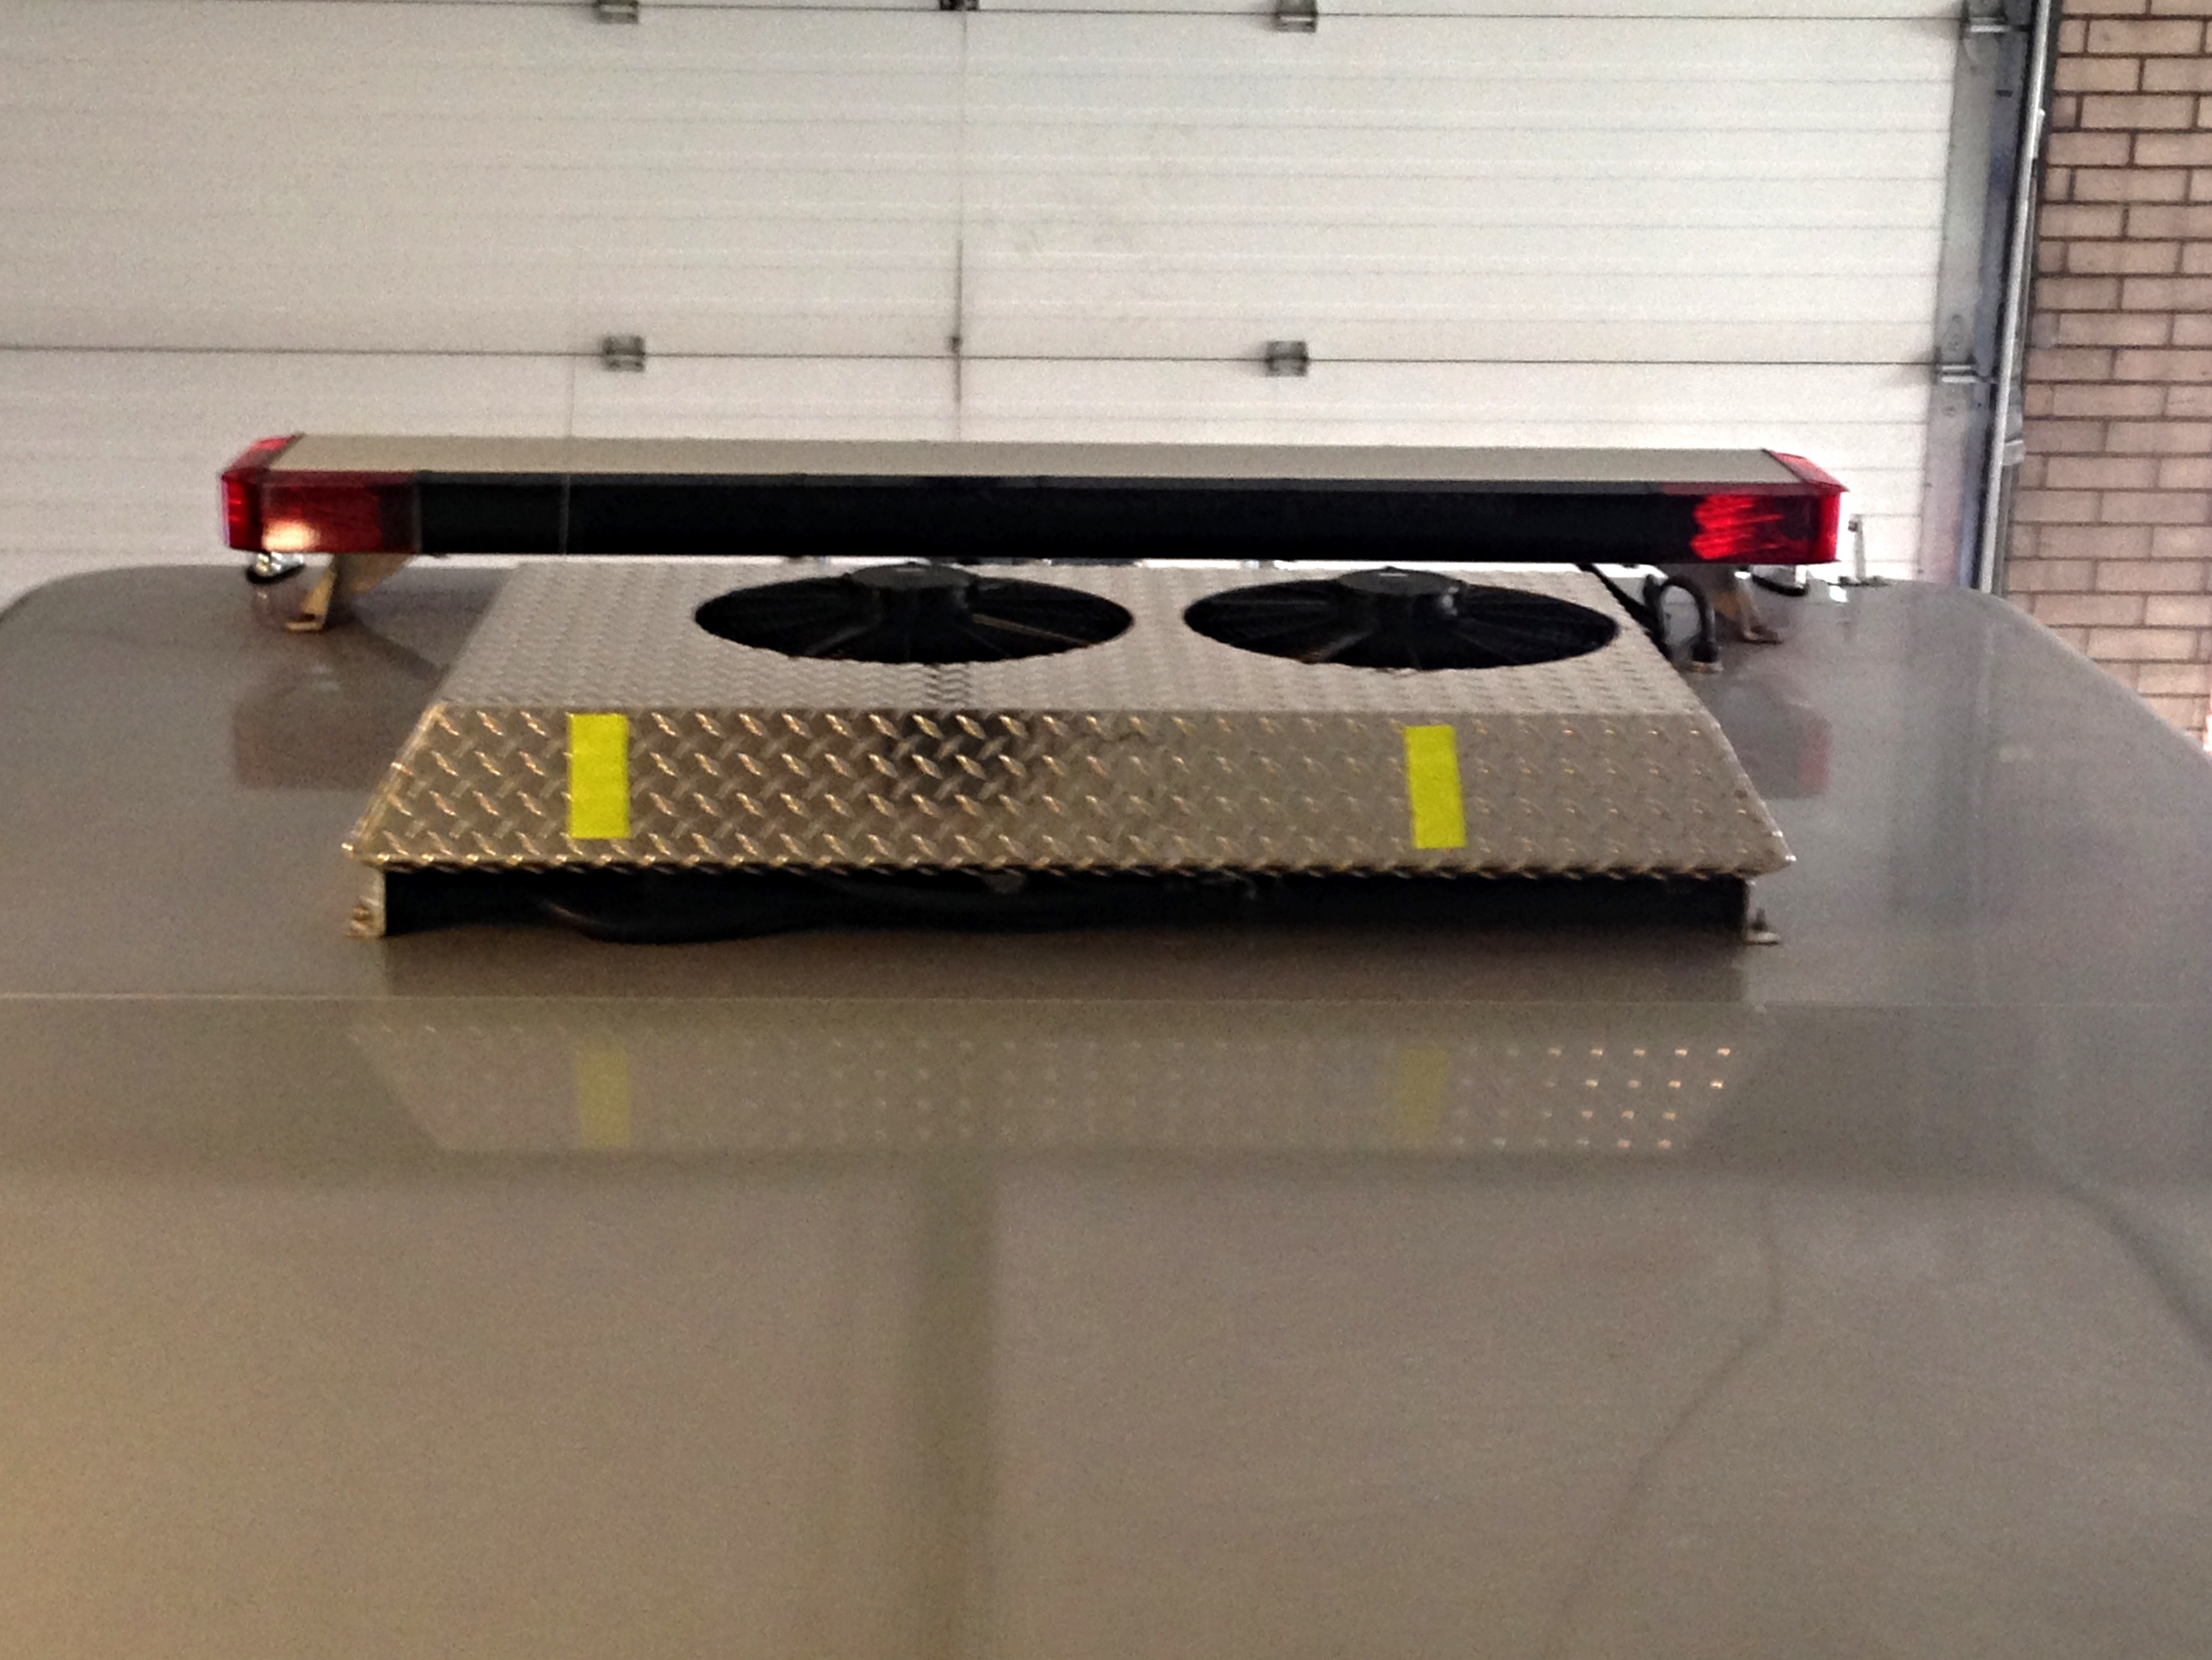
In this example, this department simply used tape as a low cost method to act as their center markers. Two pieces of yellow adhesive tape are applied on the back of the air-conditioning unit which is located on the top of the cab. Both pieces of tape line up directly in line with both sections of the aerial bed when the tractor and trailer are in the in-line position. The tiller operator knows that the apparatus is not in the in-line position when they only see one piece of tape.
When tape is used as the only center marker, it may be difficult to see at night because of the lack of illumination. (Click to enlarge)
example B:
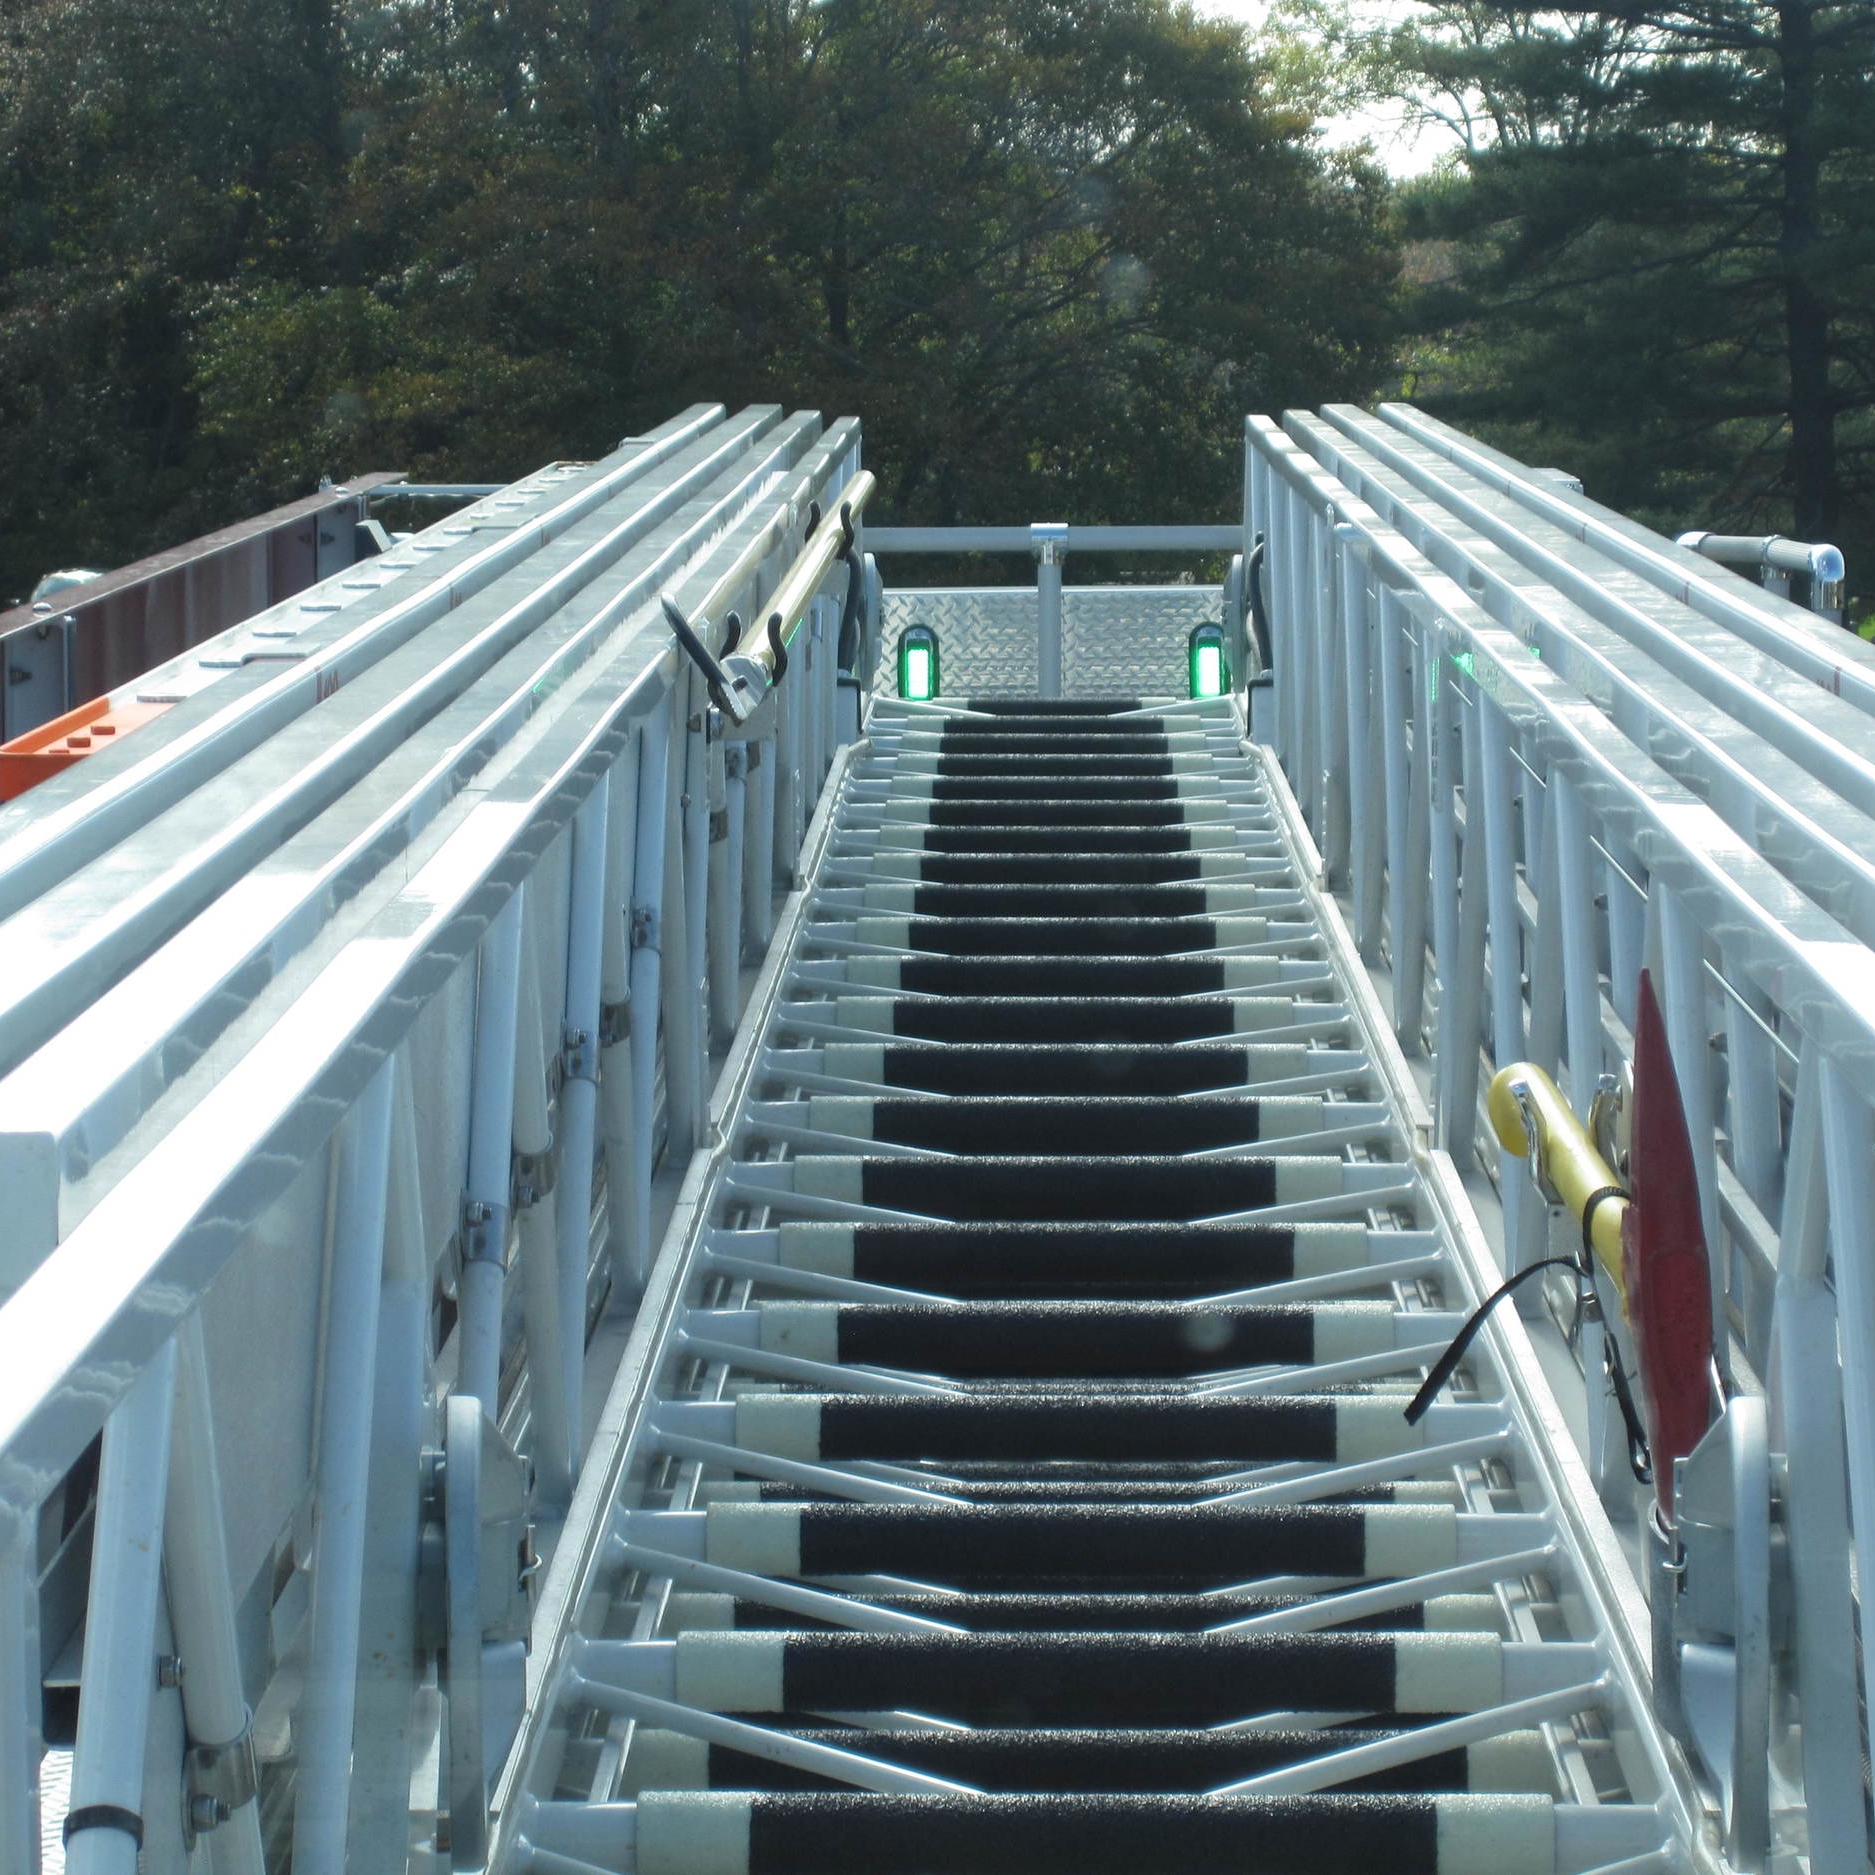
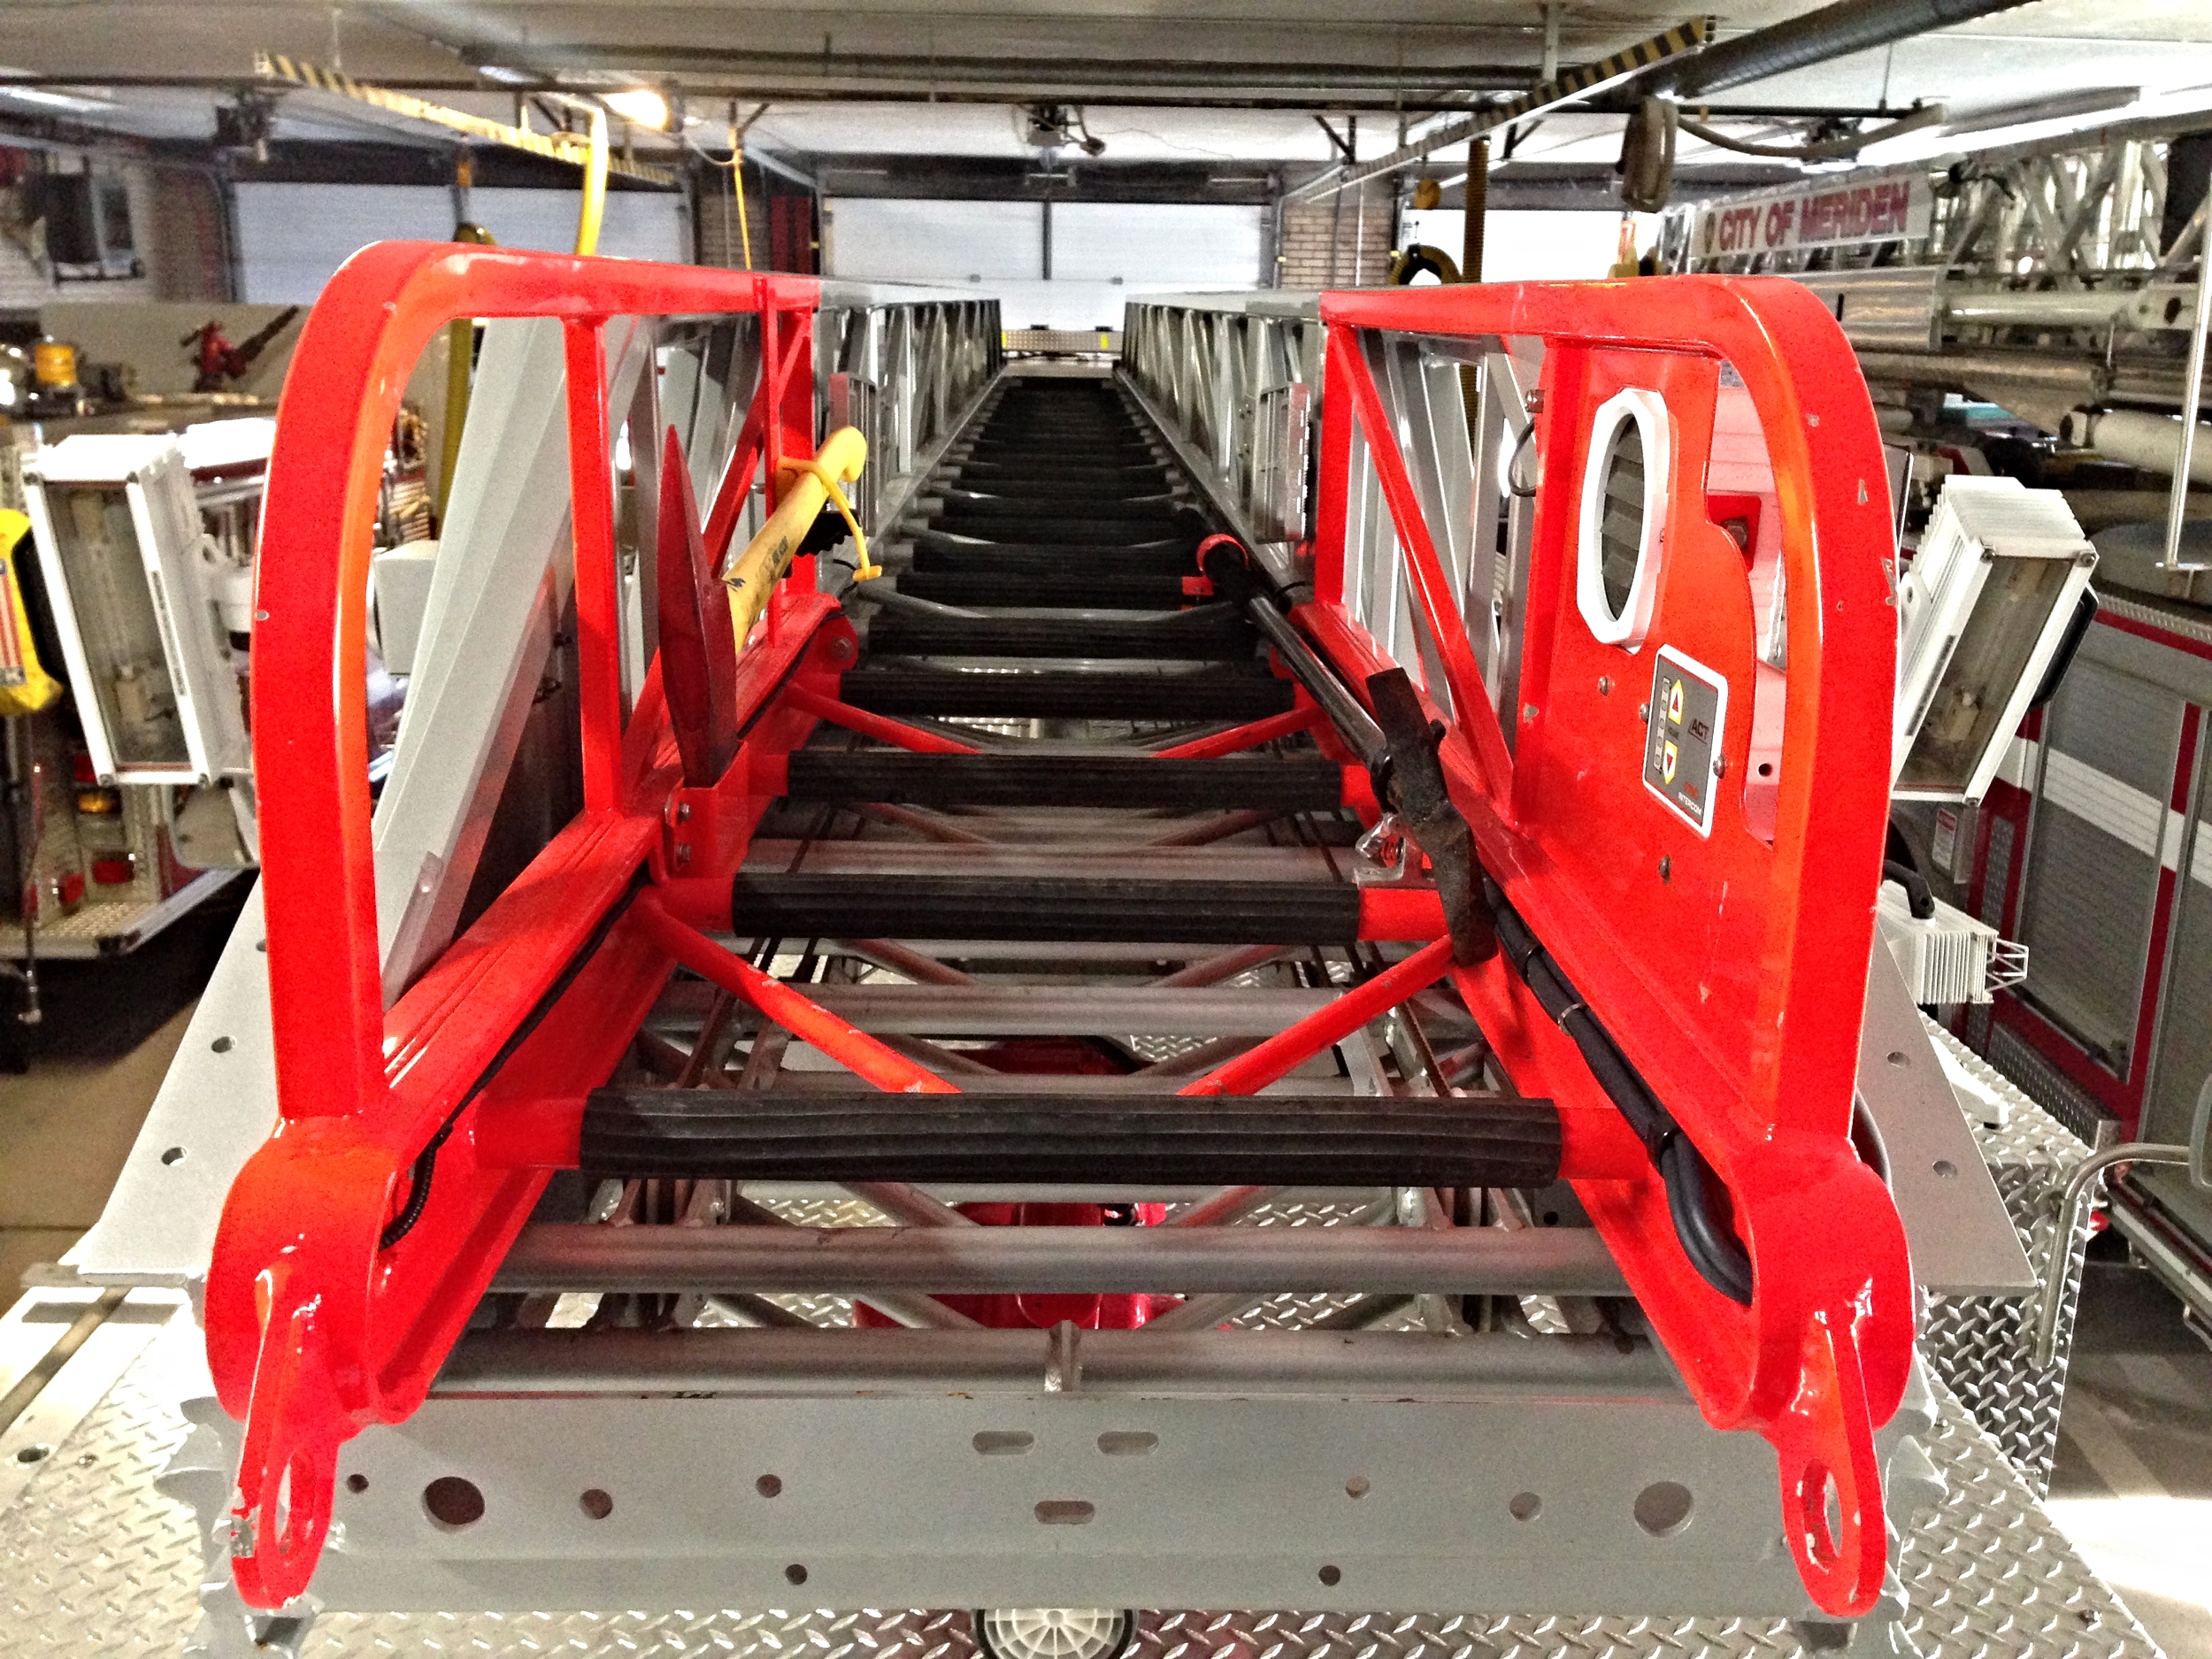
In this example, the space between each piece of rubber on the aerial rungs creates a visual guide for the tiller operator. It becomes very easy for the tiller operator to see when the center marker is not lined up down the center of the aerial. Optically, this provides a great reference point for the tiller operator. (Click to enlarge)
example c:
This department uses a different method to create their center marker. On the back of the tractor cab they have the phrase “FOLLOW ME”.
They utilize the middle bracing bar for the turntable handrail, and the two letters “L” in the word “follow”. Because the middle bracing bar is positioned dead center between the aerial on the turntable, the tiller operator uses it as a reference point to position it between the two letters “L”. This allows the tiller operator to know that the trailer is in the in-line position with the tractor.
Again, when using this type of center marker, it may be difficult to see at night because of the lack of illumination. (Click to enlarge)